How to Polish and Sharpen Japanese Chisels (Nomi) for a Perfect Cutting Edge
Last Updated: 28 Aug 2025
Introduction
Sharpening is one of the most rewarding yet challenging parts of woodworking. If you’ve ever worked with a Japanese chisel (nomi), you’ll know that the cutting edge often appears sharp after sharpening with a medium-grit stone, though it isn’t truly refined.
Unless you properly deal with the burrs left at the edge, your tool still won’t perform at its best. In this guide, I’ll walk you through the final stage of sharpening—removing burrs with a finishing stone—and share practical tips that will save you time and frustration.
Why Burr Removal Matters
Burrs are tiny folds of steel that curl up along the cutting edge during sharpening. Left unchecked, they weaken the edge and prevent the chisel from achieving a clean, razor-sharp cut. Over time, a chisel with burrs left on the edge will feel dull much faster, forcing you to return to the stones more often than necessary. This not only wastes time but also wears down the blade prematurely.
Even if you spend a long time on the medium-grit stone shaping the bevel, failing to remove the burrs correctly will undo much of your effort. The edge may look polished, but the hidden burrs will tear wood fibres instead of slicing them cleanly. That’s why traditional Japanese craftsmen place so much importance on preparing the backside of the chisel. When the backside is perfectly flat—reflective like a mirror—burrs can be released completely. Without that flat foundation, burrs cling stubbornly to the edge no matter how carefully you polish.
Step 1: Prepare the Finishing Stone
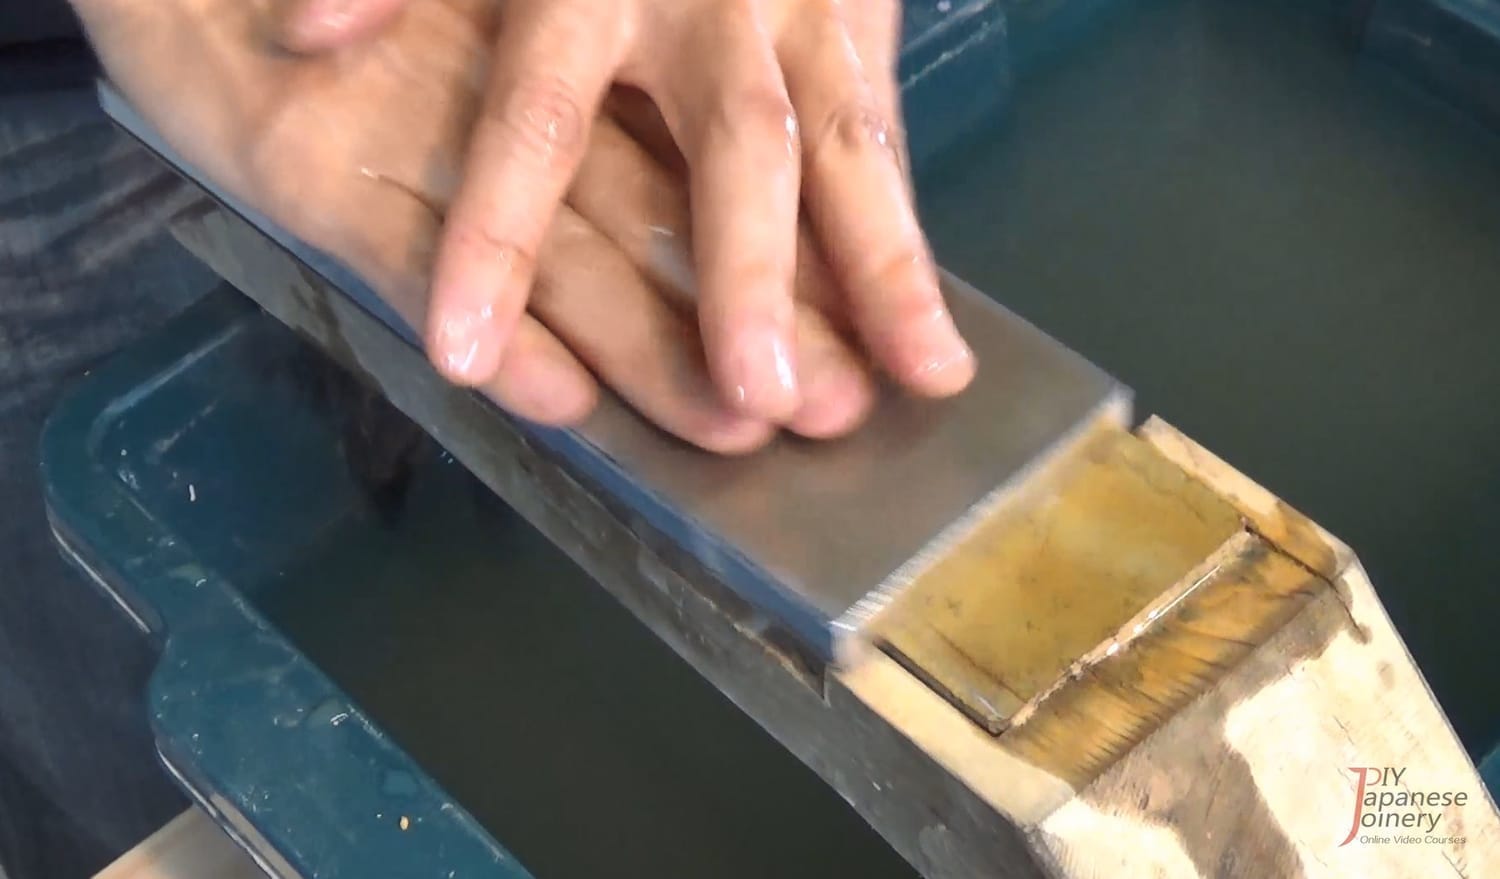
Before polishing, always resurface your finishing stone to make sure it’s flatter than your medium-grit stone. A perfectly flat stone guarantees even contact with the cutting edge and prevents the blade from rocking or creating uneven spots. If the surface is even slightly hollow or convex, the chisel’s edge will not polish consistently.
To flatten the finishing stone, many woodworkers use a diamond plate, a flattening stone, or even another coarse waterstone. Whichever method you choose, the goal is the same: remove the high spots and restore a smooth, level surface that allows the tool to make consistent contact.
Once resurfaced, use a dressing stone (also called a nagura stone) to raise slurry on the surface. This slurry acts like a fine abrasive, helping to polish the edge evenly. A good slurry indicates that your finishing stone is working as intended, giving you better control over the polishing process.
For the best results, gather the slurry evenly across the stone and keep it moist with a few drops of water as you work. This ensures that the stone cuts consistently and doesn’t dry out, which can cause scratches or uneven polishing.
Step 2: Start With the Backside
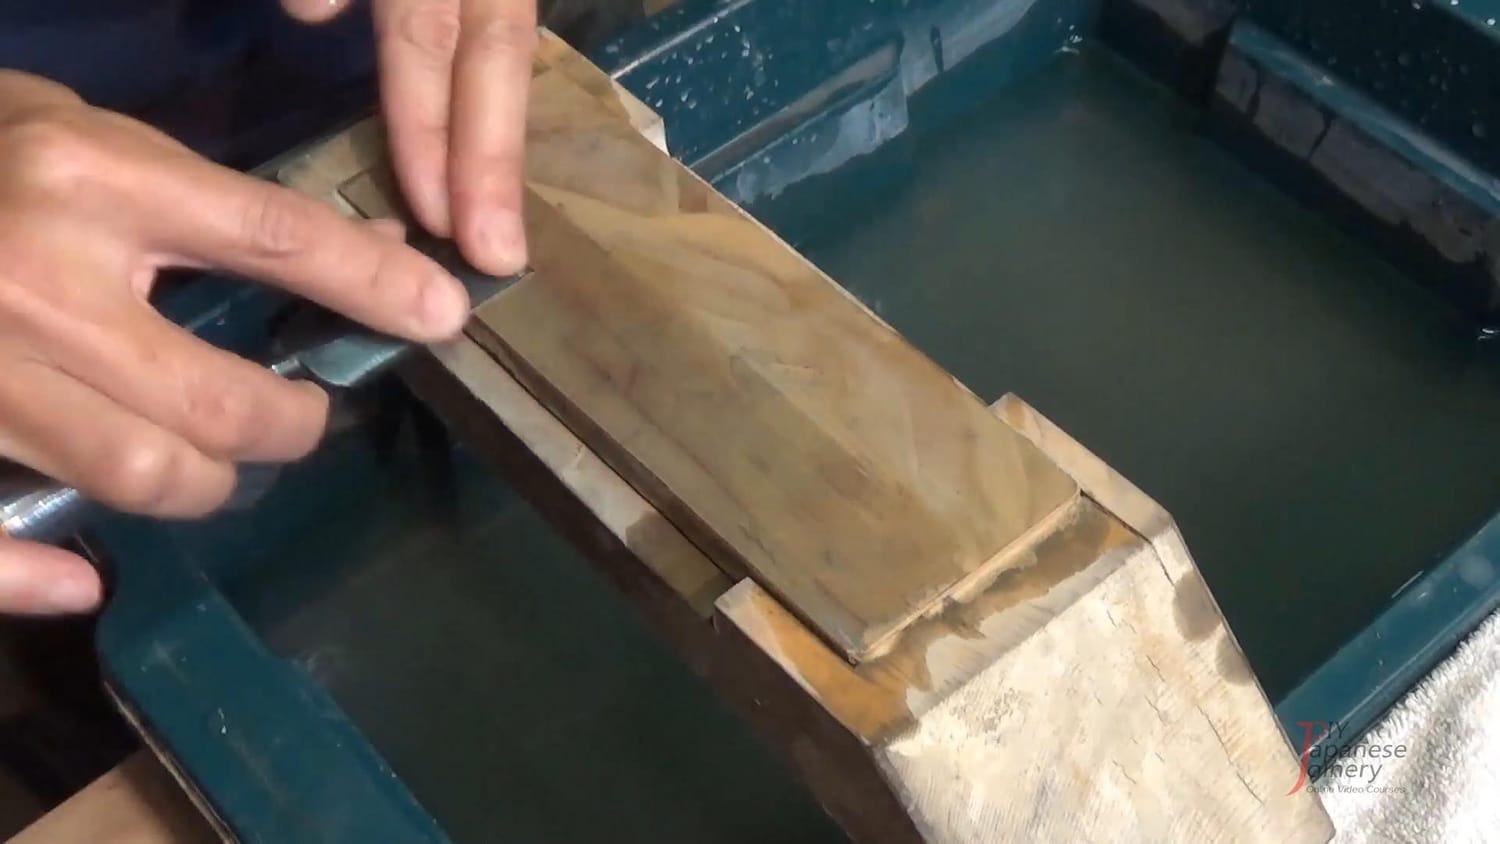
Begin polishing the backside of the chisel on the finishing stone. At first, burrs will often curl over to the bevel side, which is perfectly normal and nothing to worry about.
When working on the backside, the most important point is to keep your strokes light and controlled. The finishing stone and slurry provide all the cutting power you need, so pressing harder will not speed things up. In fact, applying too much pressure can create uneven wear, scratch the surface, or even cause the blade to rock slightly, which defeats the purpose of polishing.
Make sure to use the entire surface of the stone, moving the chisel across different areas rather than staying in one spot. This not only evens out the stone’s wear but also ensures the backside of the blade stays flat. A flat backside is essential because it forms one half of the cutting edge—if it isn’t properly maintained, the edge can never be truly sharp.
It’s also a good habit to pause occasionally and check the feel of the surface with your fingertips or observe the pattern left by the slurry. These small checks will tell you whether the contact is even and whether the burrs are gradually being removed.
Step 3: Move to the Bevel Side
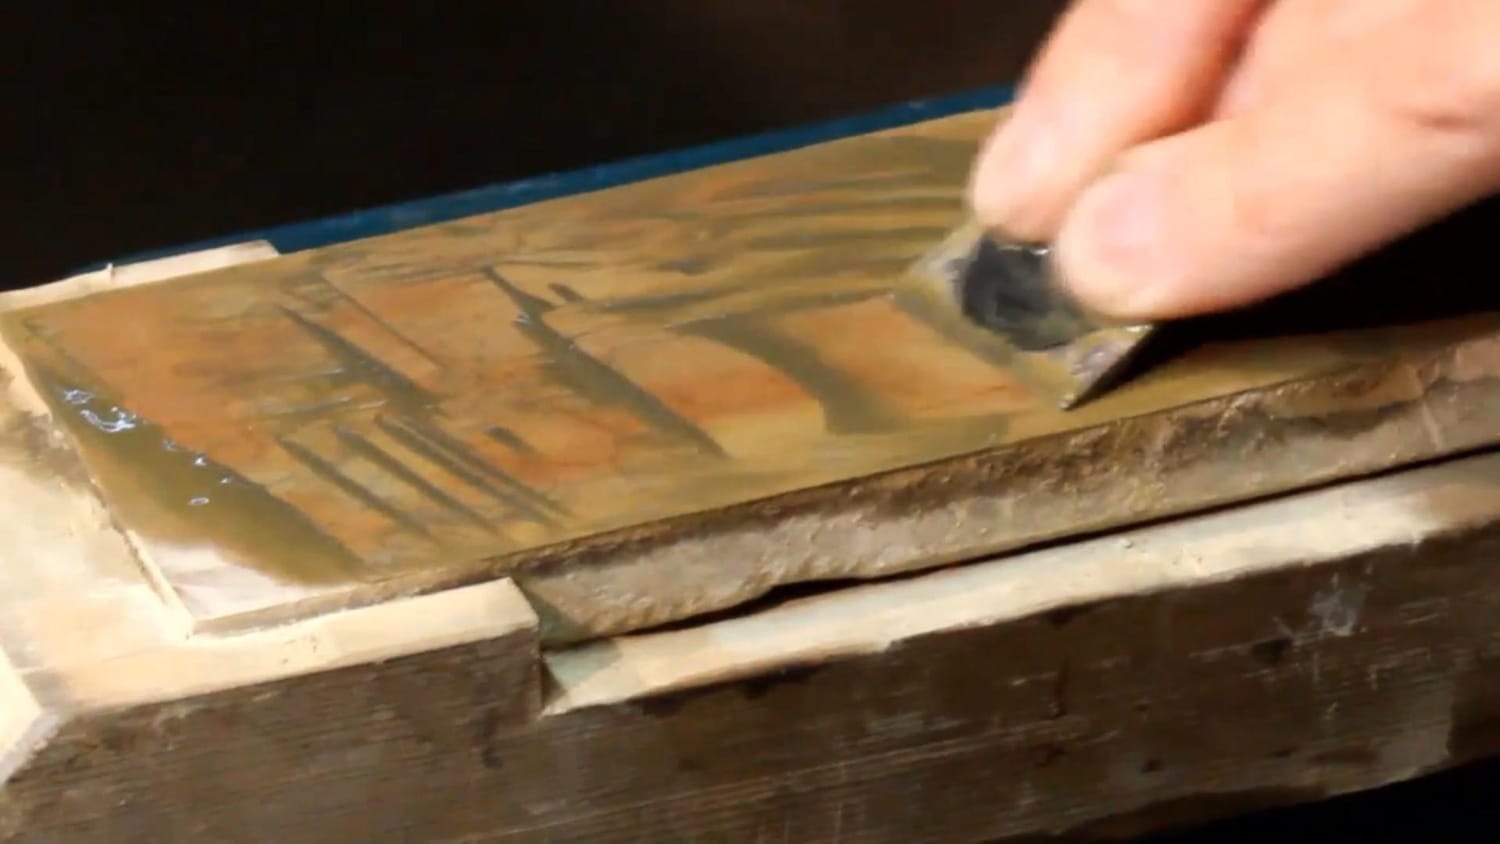
Now, polish the bevel using short, controlled strokes. Short strokes make it much easier to maintain a consistent angle, which is critical at this stage of sharpening. If the angle drifts, even slightly, you risk rounding the bevel or missing the very edge where the burrs need to be removed. A stable angle also ensures the edge develops evenly across the entire width of the blade.
Here’s a useful trick: check for dark streaks forming in the slurry. These streaks are made of fine steel particles and show that the cutting edge is in full contact with the surface of the stone. If you don’t see them, it usually means the blade is tilted or lifted slightly, and the burrs will remain no matter how long you polish. By keeping an eye on these marks, you gain immediate feedback about your technique—almost like the stone itself is telling you whether you’re on track.
It can take a little practice to recognise these streaks, especially if the slurry is thin. If you’re unsure, try adjusting the pressure very lightly or shifting the blade angle a fraction until you see the dark lines appear. Once you notice them consistently, you’ll know your cutting edge is making proper contact and the burrs are gradually being polished away.
Step 4: Alternate and Refine
Switch between polishing the backside and the bevel a few times. Alternating in this way helps you gradually work the burr back and forth until it detaches completely, instead of letting it fold stubbornly onto one side. Each pass removes a little more steel, bringing the edge closer to its final, balanced state.
As you polish, gather the slurry back toward the centre of the stone and keep it moist with the occasional drop of water. Slurry is what does most of the polishing at this stage, and if it dries out or spreads too thin, it loses its effectiveness. By regrouping it and refreshing it with water, you ensure the stone continues cutting evenly without leaving scratch marks.
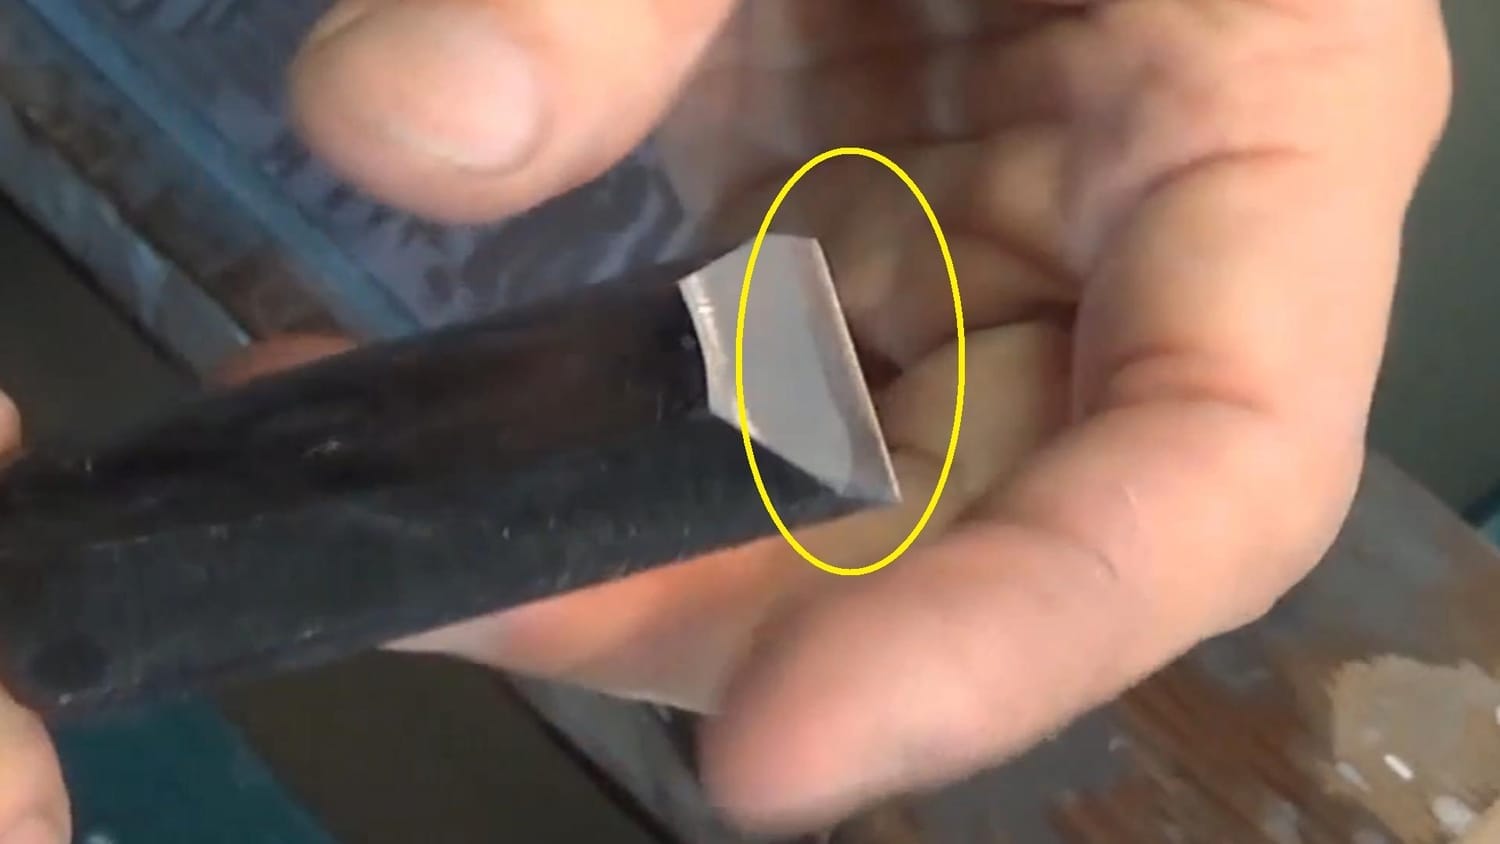
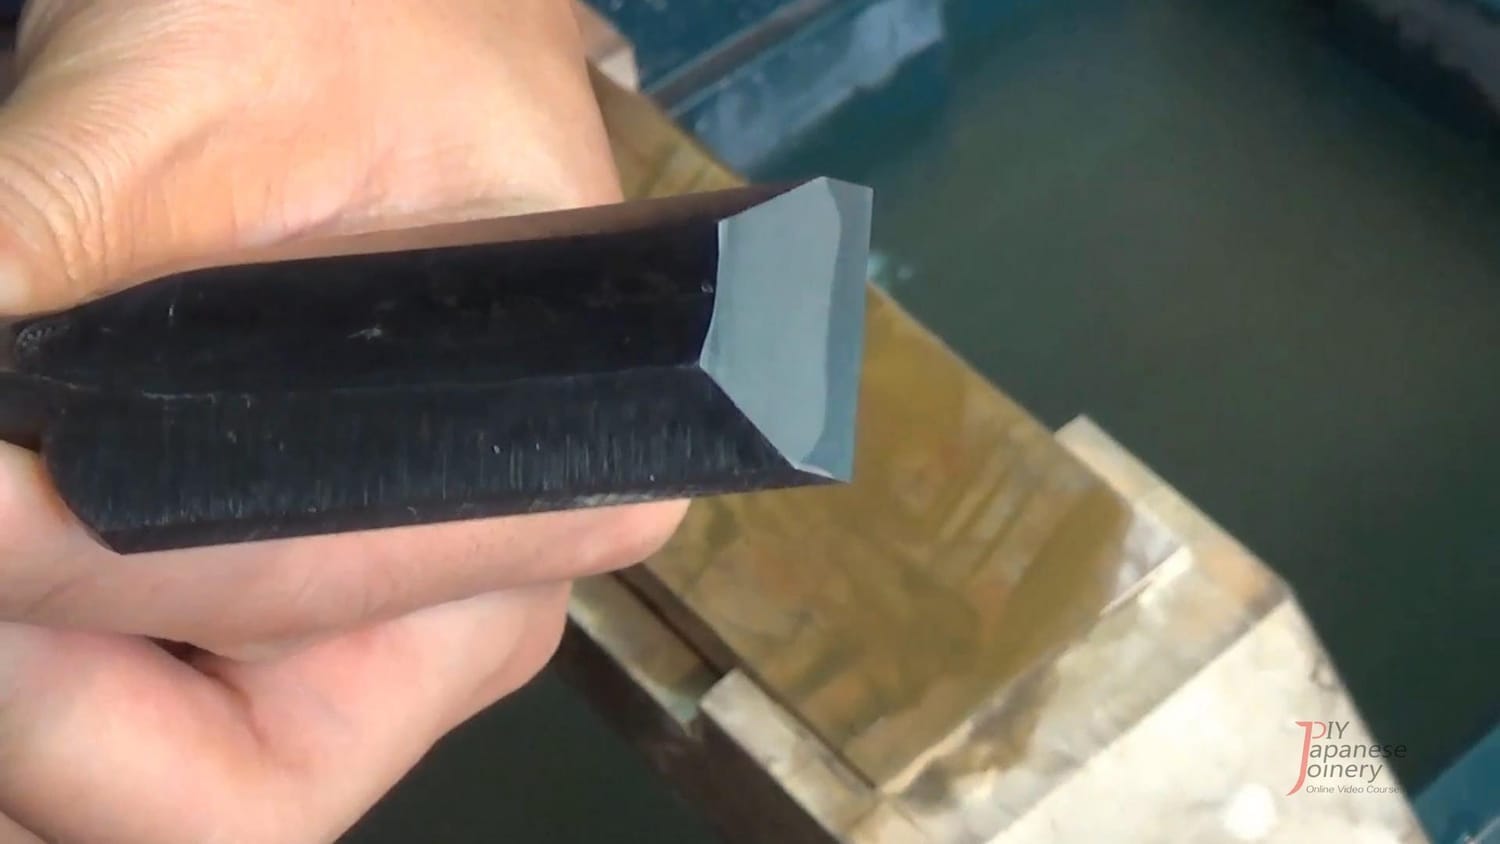
The process may take several passes, especially if you are working with a blade that hasn’t been sharpened in a while. Be patient—rushing can cause uneven polishing or leave burrs clinging to the edge. Over time you’ll notice the coarse scratches left by the medium stone become finer and more uniform, and the edge itself will look clean and consistent from corner to corner. This even, refined surface is your sign that the burrs are finally gone and the tool is ready for use.
Step 5: Testing the Edge
To confirm that your chisel is truly sharp, it’s important to test the edge rather than relying on appearance alone. A blade can look polished and neat but still carry tiny burrs or a rounded edge that weakens its cutting power. These simple tests give you immediate feedback and help ensure that the tool is ready for precise work.
Paper test
Take a clean sheet of paper and hold it lightly in one hand. With the chisel in your other hand, try slicing down through the paper. A properly sharpened chisel will glide through effortlessly, almost as if the paper offers no resistance at all. If you feel tearing, catching, or rough edges in the cut, that means the blade still has burrs or hasn’t been fully refined. The paper test is a safe and reliable way to check sharpness, making it ideal for beginners.Finger test (traditional)
Experienced woodworkers often use a more tactile method passed down through generations: very lightly brushing the edge across the ball of the finger. When the blade is sharp enough, you’ll feel it “bite” with the slightest touch, almost as though the edge is eager to cut. This method gives immediate feedback about the crispness of the cutting edge.
Common Mistakes to Avoid
Not flattening the backside properly
If the backside of the chisel isn’t perfectly flat, burrs will cling stubbornly to the edge. This makes it almost impossible to remove them completely, no matter how carefully you polish the bevel. The result is a blade that looks sharp but fails to cut cleanly.Using too much pressure
Many beginners think pressing harder will speed up the process, but in reality it creates uneven wear on the stone and scratches on the blade. Excessive pressure can also cause the chisel to rock, rounding off the edge instead of refining it. Light, controlled strokes let the stone and slurry do the work. Remember: sharpening is about precision, not force.Ignoring slurry streaks
The dark streaks left in the slurry are a valuable sign that the cutting edge is making proper contact with the stone. If you don’t see them, the edge isn’t fully touching the surface, which means the burrs won’t disappear. Checking for these streaks is like reading feedback directly from the stone—it tells you whether your angle and pressure are correct. Make it a habit to watch the slurry as you polish, rather than simply relying on feel.
Final Thoughts
Sharpening Japanese chisels isn’t just about creating an edge—it’s about refining it so the tool is both sharp and durable. Removing burrs is the last, essential stage that turns a shaped edge into one that cuts cleanly and holds longer.
Keep the finishing stone flat, use a light touch, and alternate between backside and bevel so the burrs work free instead of folding back. Watch the slurry for dark streaks to confirm full contact, and test with paper—or the traditional finger check if you’re confident. With these habits, your chisel will stay sharp longer and reward you with accurate, reliable cuts.
Removing burrs isn't just finishing—it's what makes your chisel truly sharp and durable. Ready to master the feel and precision of a clean chisel edge?
Begin with the 14-day free trial at DIY Japanese Joinery for full access to tool care, sharpening, and joinery techniques.
Latest Posts
Free 14 day trial
Some moments just can’t be captured in pictures or text. Watch every movement in detail—the way the tools are handled, the pressure applied, the exact angles.
Get full access to all lessons in the DIY Japanese Joinery online course free for 14 days and start building with confidence today.
About me

Hi there, I’m Hisao Zen, a Japanese woodworking artisan with 25+ years’ experience. I share the techniques and traditions of joinery through online courses, guiding beginners step by step while inspiring them to carry this timeless craft into the future.
Latest Posts
See What Photos and Words Can’t Show You
Some moments just can’t be captured in pictures or text. Watch every movement in detail—the way the tools are handled, the pressure applied, the exact angles.
Get full access to all lessons in the DIY Japanese Joinery online course free for 14 days and start building with confidence today.
©2025 DIY Japanese Joinery
All pricing is in U.S. dollars.
Some images by Freepik


