Why Wood Warps and How to Prevent It: Causes, Types (Cup vs. Twist), and Solutions
Last Updated: 6 Sep 2025
Introduction
You bring home lumber from the lumberyard, eager to dive into your next woodworking project.
But after only a few days, you notice something troubling—the boards have already started to warp.
“You’ve got to be kidding—I was ready to make something great!”
This is a frustration almost every woodworker has faced at some point. Even kiln-dried lumber can move and change shape depending on the environment and the orientation of the grain.
In this article, I’ll explain the two main types of wood warping—cup and twist—and how to recognise them when working with lumber. I’ll also cover one of the biggest factors behind warping: the difference between plain-sawn (also called crown-sawn) and quarter-sawn boards. Finally, I’ll share practical tips for storing and selecting lumber to prevent warping in your woodworking projects.
Why Does Wood Warp?
Wood is a living material, even after it’s been cut. Its fibres still hold moisture and continue to absorb and release water depending on humidity. This constant expansion and contraction is what causes boards to move over time.
Based on my own experience, the main causes of warping are:
Shrinkage differences in growth ring direction
How the log is sawn determines how the board will shrink, and this is the root cause of warping.Uneven drying
Even kiln-dried timber can contain internal stress, which may cause delayed warping later on.Environmental conditions
Workshop humidity, airflow, or moisture from the floor can all push the board into movement.
In short, warping is determined by a combination of grain orientation and environment.
Plain-Sawn vs. Quarter-Sawn: How the Cut Affects Wood Warping
Understanding wood warping requires understanding how the log was sawn. It’s impossible to explain warping without touching on plain-sawn and quarter-sawn lumber.
Plain-Sawn
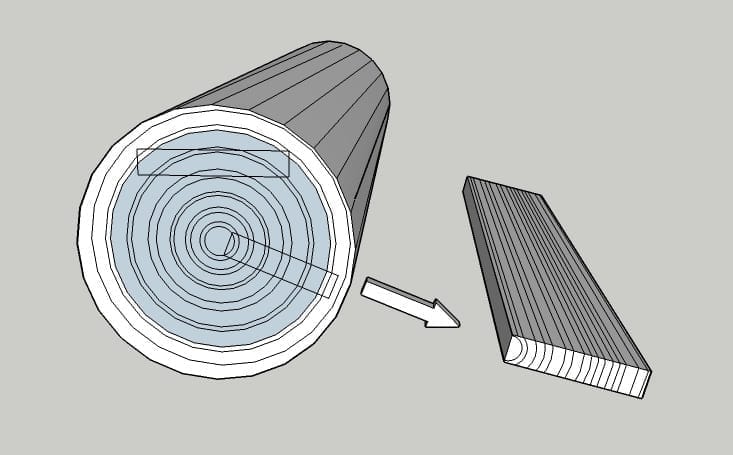
When a log is cut tangentially to the growth rings, the result is plain-sawn lumber. The board face shows a cathedral-shaped pattern, often prized for its decorative look.
This sawing method produces one side that is the bark side and the other that is the heart side (pith side). Because the growth rings form a curve, drying causes them to shrink unevenly, making plain-sawn boards prone to cupping across the width. Over long spans, they also tend to bend lengthwise, with the board bowing toward the heart side.
Key characteristics:
Decorative, expressive grain
Higher yield, more affordable
But more prone to warping across the width and bending lengthwise

Quarter-Sawn
Quarter-sawn boards are cut radially from the center of the log. The face shows straight, parallel grain, giving a calm and balanced appearance.
Because the growth rings are nearly perpendicular to the face, shrinkage is more uniform, making quarter-sawn boards far more dimensionally stable.
Key characteristics:
High stability, minimal movement
Suitable for fine joinery and thin planing (e.g., shoji screens, cabinetry)
Less yield per log, more expensive
From my own experience, warping is overwhelmingly a problem with plain-sawn lumber.
Types of Wood Warping and How to Identify Them
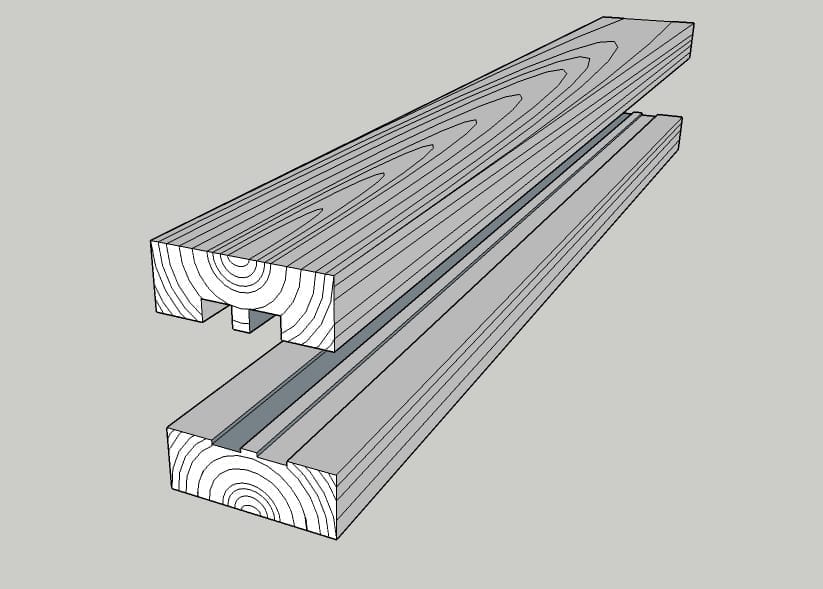
1. Cup Warping
This is when the board bends in a “U” shape across its width. It is especially common in wide plain-sawn boards—even carefully selected kiln-dried lumber will almost always show some degree of cupping.
How to check: Place a straightedge across the width. If the bark side edges lift, the board has cupped.
2. Twist Warping
Twist warping makes a board behave like a propeller, with the four corners twisting in different directions. When this happens in doors or long boards, it can be especially troublesome.
How to check: Place the board on a flat surface. If opposite corners rise and rock, the board is twisted.
Even quarter-sawn boards can twist, but plain-sawn boards are far more susceptible.

Cross-section of a board showing cup warping with edges lifting on the bark side
What to Do When Boards Warp
This is the part everyone wants to know: “What can I actually do if my board has warped?”
My conclusion is simple: the only true solution is to plane it flat using a jointer or planer. But of course, this only works if you have enough thickness to spare.
When that’s not possible, there are some temporary fixes you can try:
1. Apply a wet towel along the bark side, covering the center line from end to end
2. Stand the board against an outdoor wall with the heart side facing the sun
3. After a while, the warp will reduce
However, this only works temporarily. Once the moisture balance between bark side and heart side shifts again, the board will warp back.
The practical approach:
Mark and cut the board before it warps again
If the board is to be used in joinery, assemble it quickly so the joinery restrains further warping.
Note: These tricks only work for cup warping. If the board is twisted, the only solution is to plane down the high corners.
How to Prevent Wood Warping: Storage and Selection
In the end, prevention is better than cure. The way you store and select timber is crucial.
Storage Basics
Avoid direct sunlight → prevents uneven drying and cupping
Keep boards off the floor → prevents moisture uptake from concrete
Stack with stickers (spacers) → allows airflow and even drying
Let Boards Acclimate
Don’t use timber immediately after purchase. Leave it in your workshop environment for a few weeks so moisture content balances out.
Choosing Boards
When budget allows, prefer quarter-sawn
If using plain-sawn, design joinery to control the movement
Avoid boards with strongly curved growth rings or many knots
Conclusion
The reality is simple: all boards warp.
In fact, the Japanese kanji for “板” (board) is written with the radical for wood and the character for “warp.” From ancient times, it was accepted that boards would move.
That’s why the important part is to understand wood as a moving material, and design, cut, and join with that in mind. Japanese woodworking takes this even further: instead of avoiding movement entirely, it often uses the direction of warping to advantage. For example, in shoji screens, both the upper and lower rails are oriented so the bark side faces the sliding doors. As the rails shrink and bend lengthwise, the top rail curves slightly upward and the bottom rail curves slightly downward. This ensures the rails don’t pinch the door in the middle, keeping the movement smooth and free.
Only a few lucky woodworkers have enough space to season lumber for five or six years before use. The rest of us work with boards that will inevitably move.
By understanding the difference between plain-sawn and quarter-sawn, recognising types of warping, and storing timber correctly, we can turn a natural challenge into practical wisdom.
Ready for structured, in-depth training?
Latest Posts
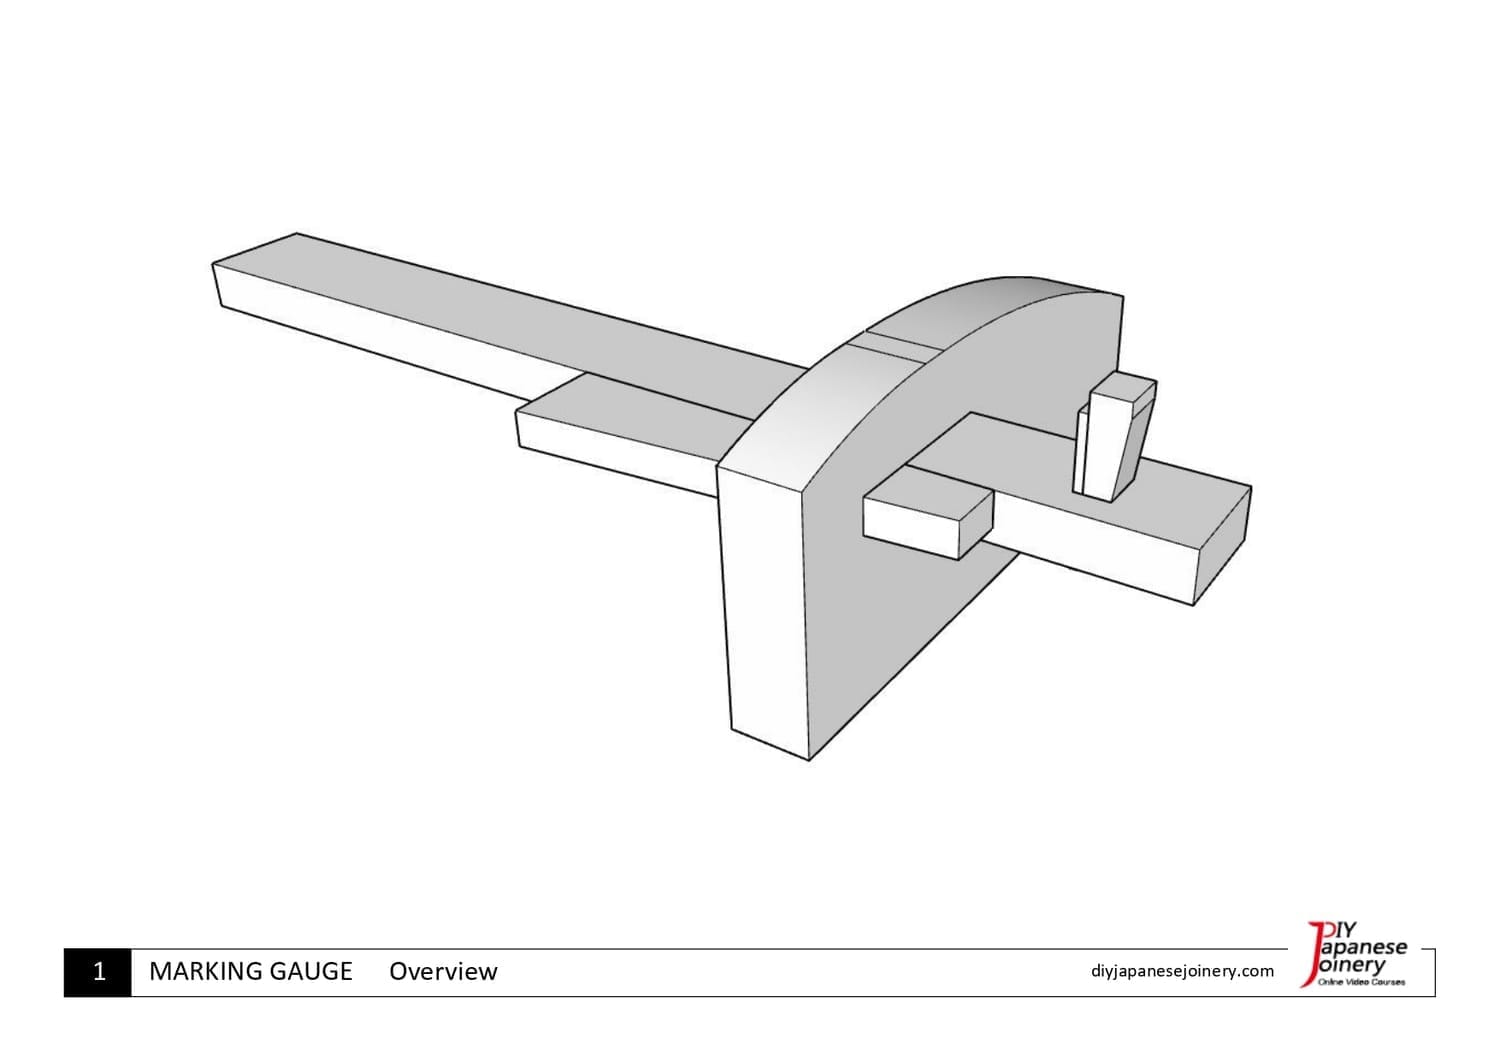
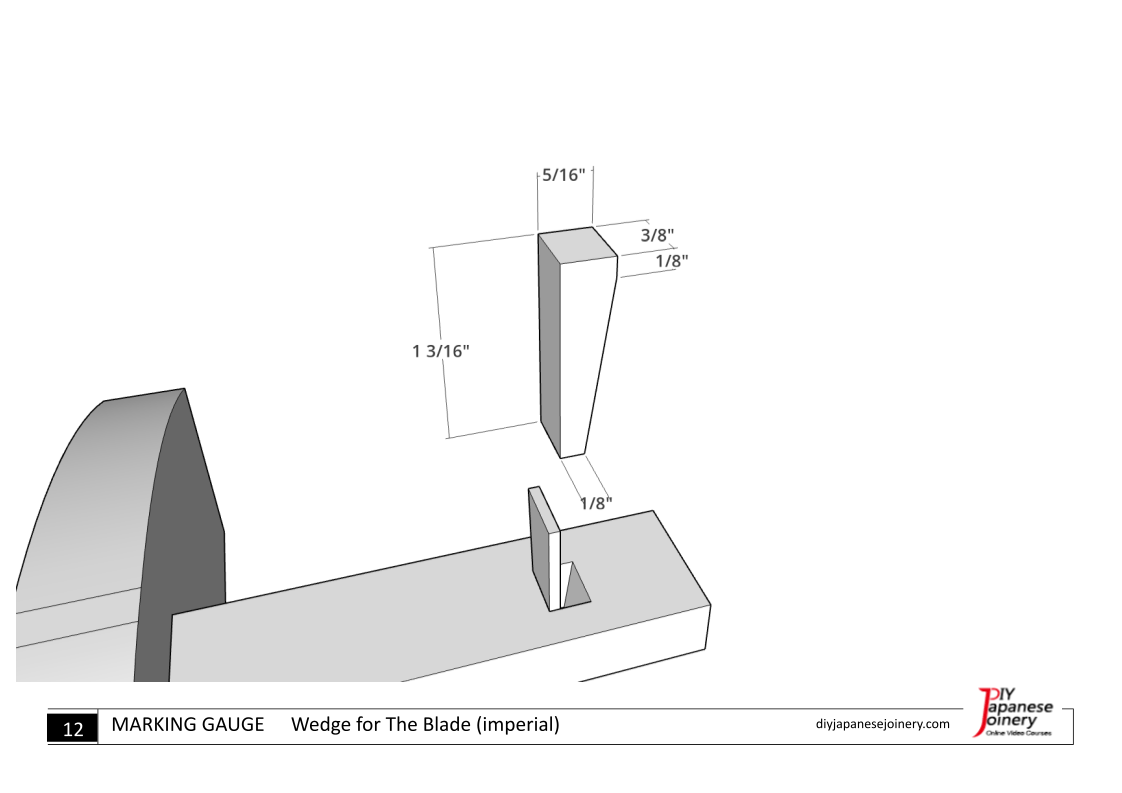
Precision Starts with a Single Line.
Get the detailed diagrams to craft your own Japanese marking gauge (Kehiki). Start your journey with the foundational tool of Japanese joinery.
Precision Starts with a Single Line.
Get the detailed diagrams to craft your own Japanese marking gauge (Kehiki). Start your journey with the foundational tool of Japanese joinery.
About me

Hi there, I’m Hisao Zen, a Japanese woodworking artisan with 25+ years’ experience. I share the techniques and traditions of joinery through online courses, guiding beginners step by step while inspiring them to carry this timeless craft into the future.
Latest Posts


©2017–2026 DIY Japanese Joinery
All pricing is in U.S. dollars.
Some images by Freepik