How to Sharpen Japanese Chisels (Nomi) – How to Set Up Your Sharpening Space
Last Updated: 4 Sep 2025
Introduction
A well-organised sharpening space makes a huge difference to both the quality of your edge and the enjoyment of the process. When your workspace is thoughtfully arranged, you can sharpen faster, keep your tools and stones in better condition, and avoid unnecessary mess. Whether you’re working at home or on-site, having a consistent setup helps you develop good habits and maintain a smooth workflow.
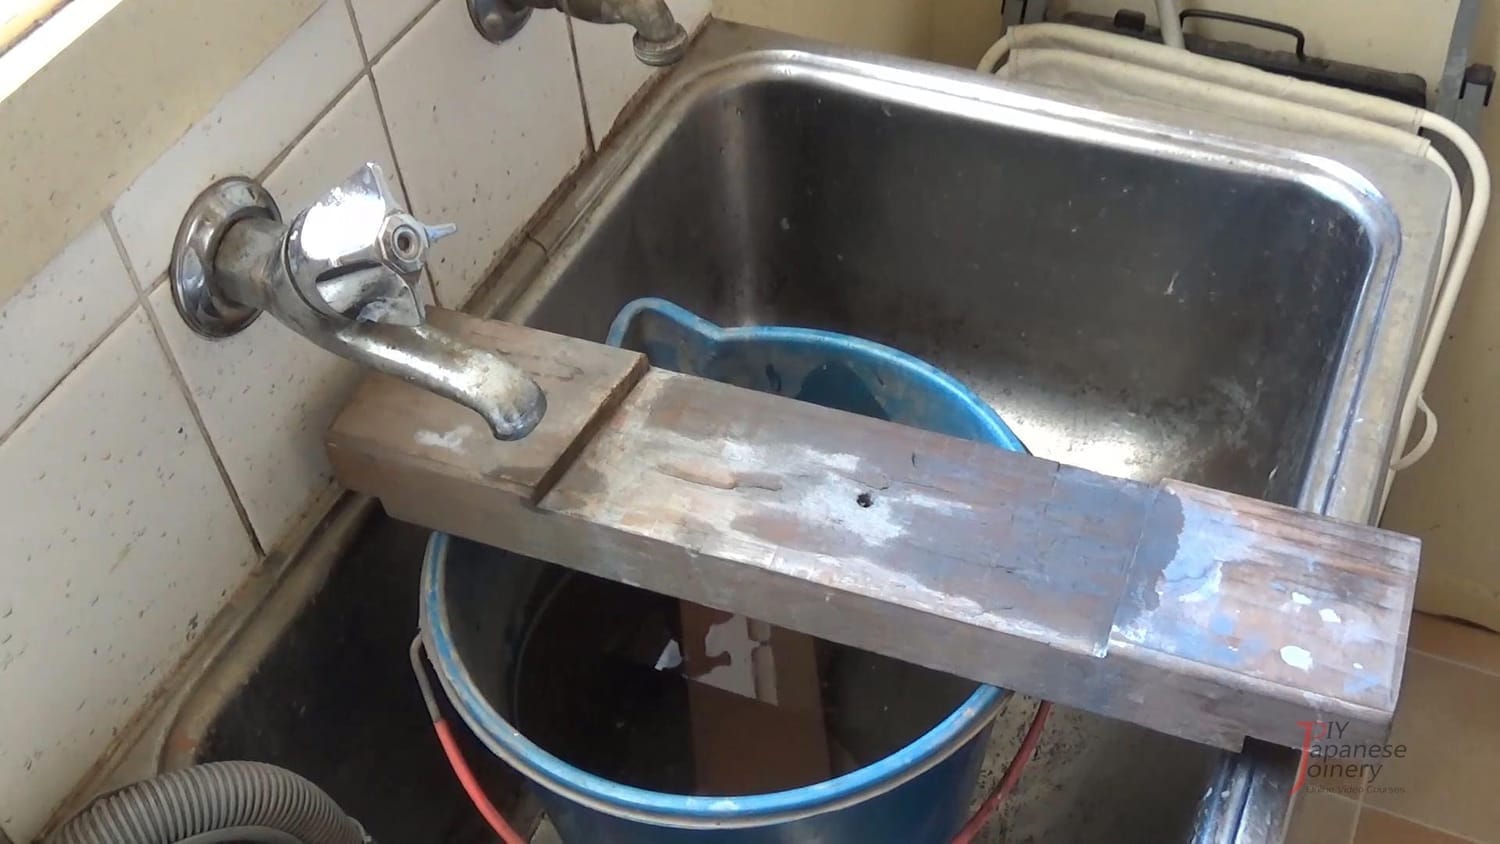
Home Setup – Using a Laundry Sink
If you have access to a laundry sink, it’s one of the most practical sharpening locations. The sink is usually at a comfortable standing height, and you can keep the water supply running without splashing over your entire bench.
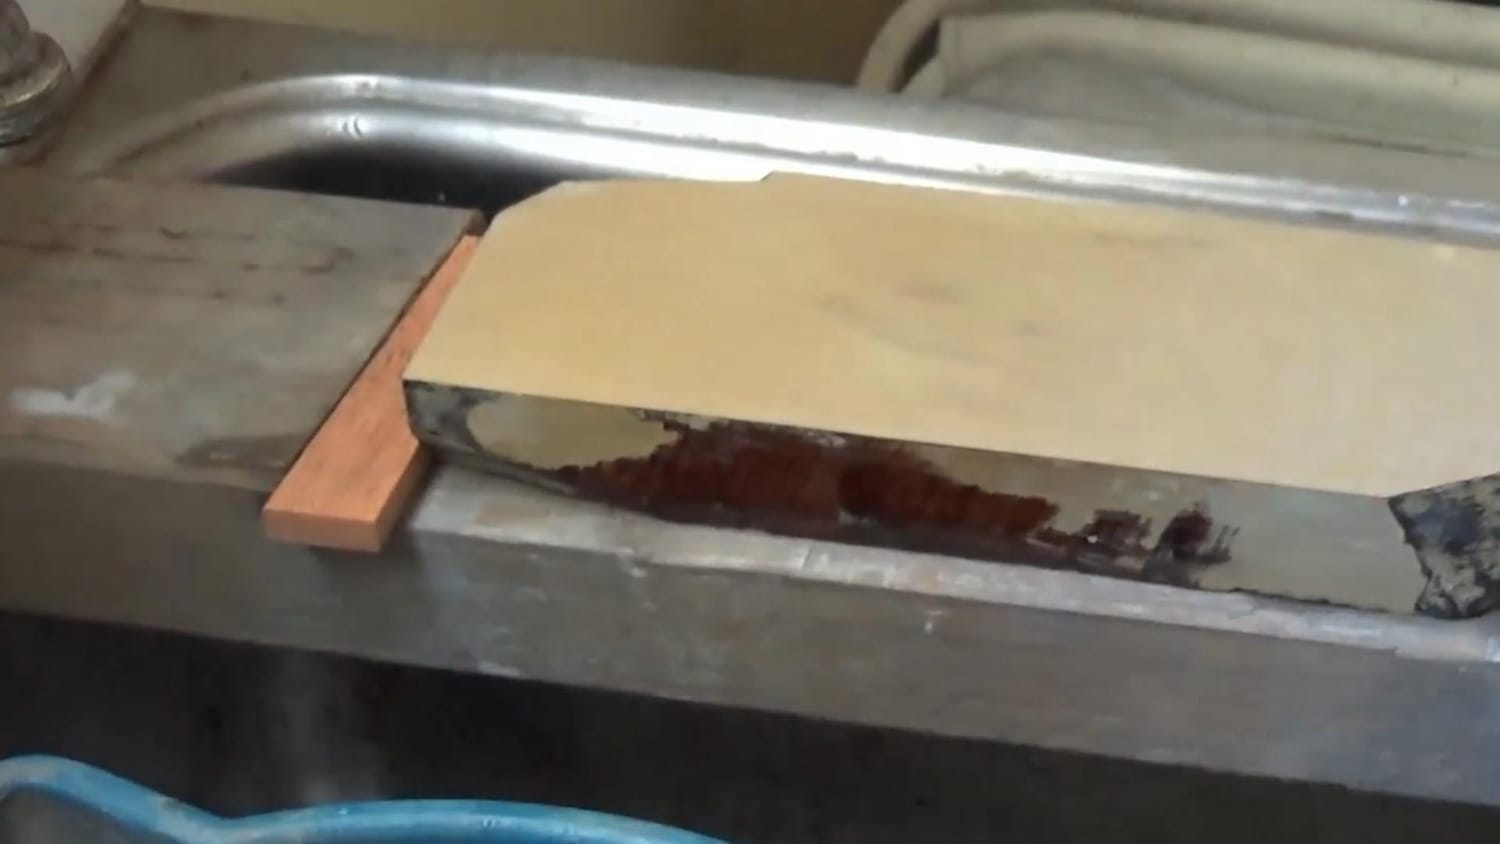
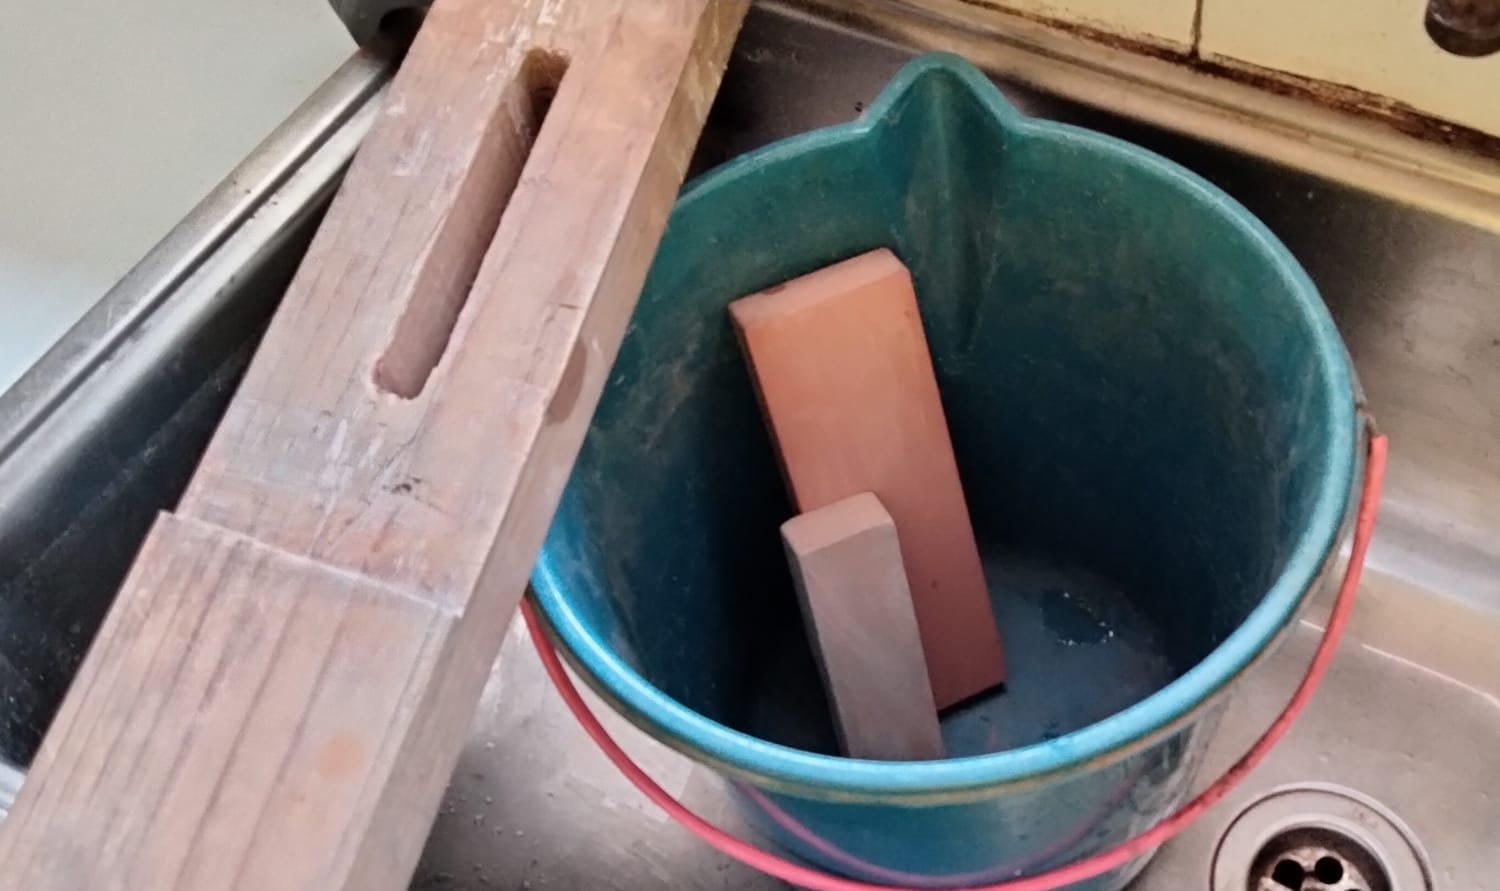
Stable Base: Place a sturdy board or tray across the sink to hold your stones. This allows water to drain away while keeping the stones stable and secure.
Lighting: Good lighting is important—position the sink area so you can see reflections on the blade clearly.
Tool Rest: A simple hook or shelf nearby is handy for resting chisels and plane blades while switching stones.
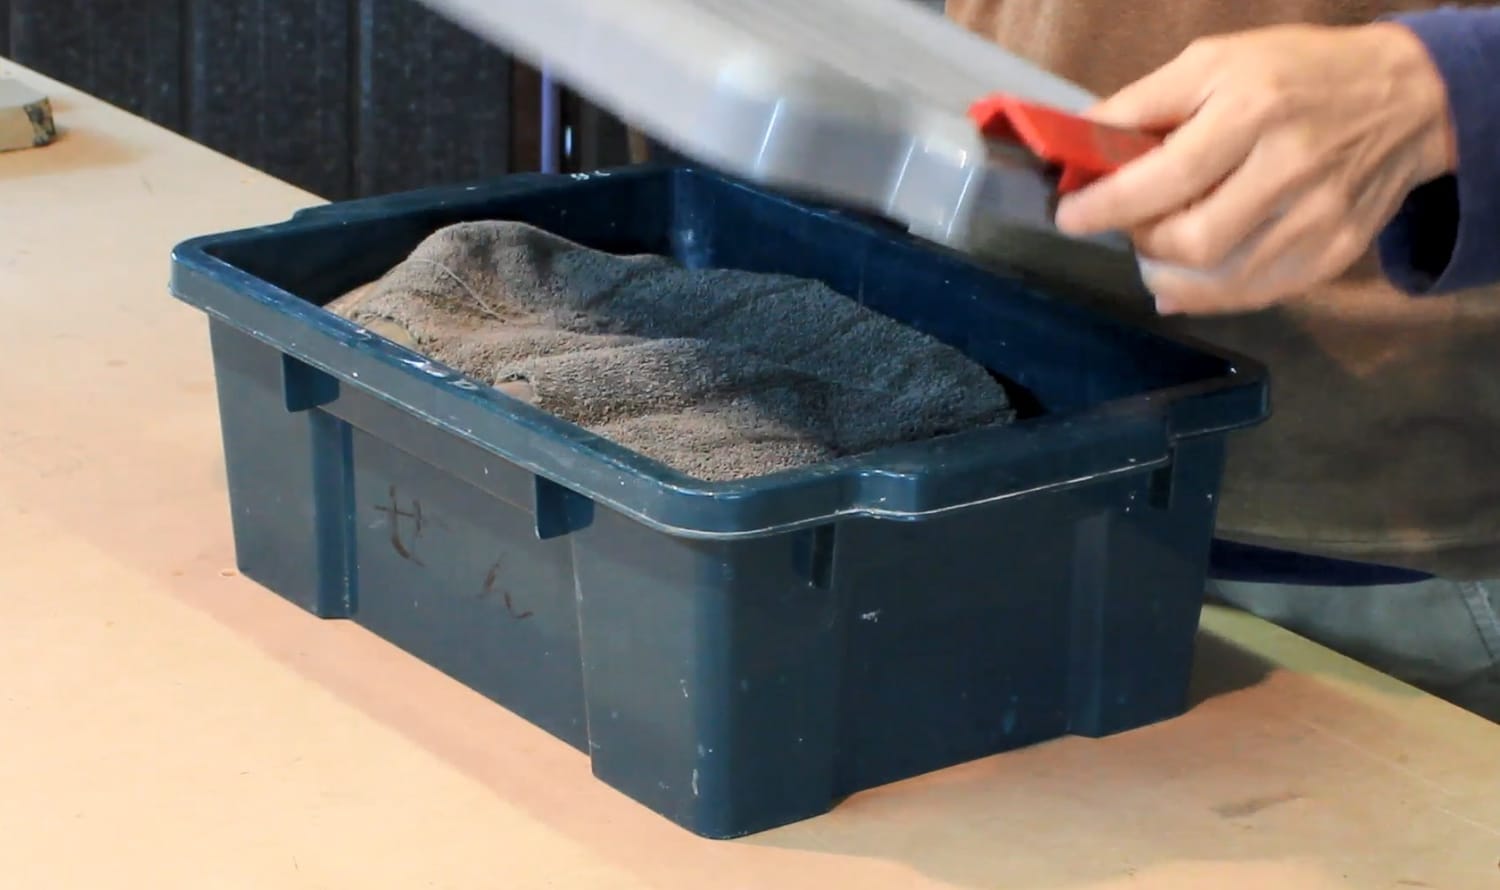
Portable Setup for On-Site Work
When you’re working on-site or in a small workshop without a fixed water source, you need a portable sharpening station that’s easy to carry, quick to set up, and stable to use.
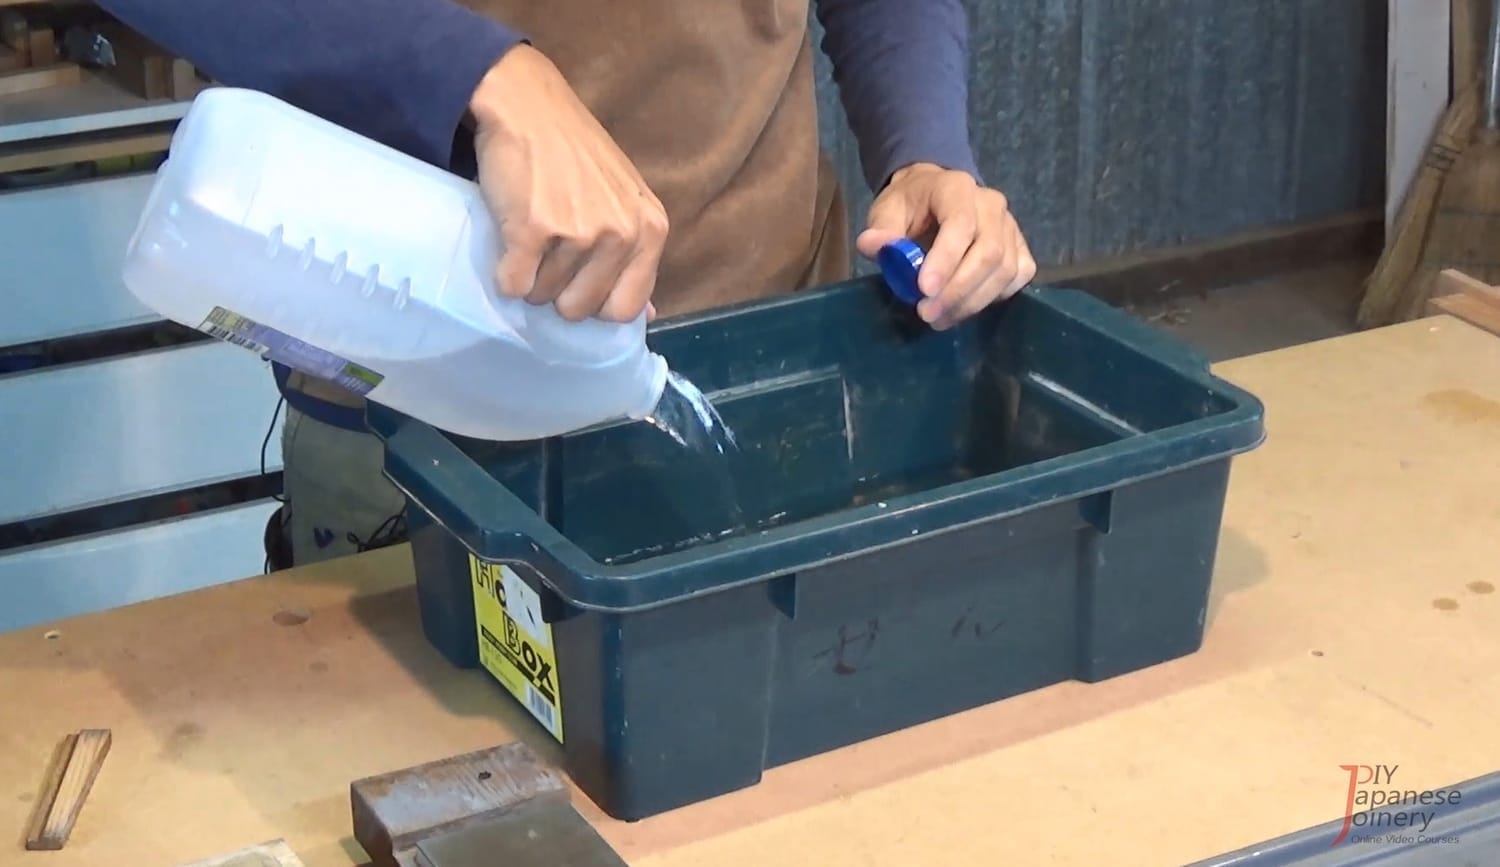
Tub and Storage Box: Use a deep plastic storage box to keep everything together—whetstones, spray bottle, stone holder, nagura stone, and even a small towel. On-site, the box doubles as a water tub for soaking and using the stones. Its depth prevents splashing, and once sharpening is finished, you can pour out the water, close the lid, and carry everything as one unit.
Water Supply: Fill the tub with enough water to soak your stones before starting. Keep a spray bottle nearby for topping up water as you work—this lets you control moisture without making the tub overflow.
Work Surface: A folding workbench, sawhorses with a board across them, or even a sturdy crate can serve as a base. Aim for a height that allows you to work comfortably without bending too much, as this will reduce fatigue during longer sharpening sessions.
Compact Storage: Keep your stones, spray bottle, and towel together in a small toolbox or bucket so you can transport them easily. Having everything in one container also means you’re less likely to forget a key item when heading to the job site.
Extra Tips for Comfort and Efficiency
Height Matters: Aim for a work surface that sits roughly at your waist height. This helps keep your back straight and your shoulders relaxed, reducing fatigue during longer sharpening sessions. If you’re working on-site and the available table is too low, place a sturdy board or crate underneath your station to raise it to a more comfortable level.
Non-Slip Surfaces: Wet whetstones can shift suddenly, especially when you’re applying pressure. Secure them with a damp cloth, a rubber mat, a wedge to brace them in place, or a stone holder to prevent slipping.
Towel or Rag: Keep a small towel or rag within arm’s reach to quickly dry your hands, tools, and work surface. This not only prevents rust on your blades but also helps you maintain a firm grip, especially when handling delicate edges.
Storage and Care for Whetstones and Tools
After sharpening, proper care of your stones and tools not only extends their life but also ensures they perform consistently the next time you use them. Neglecting this step can undo much of the work you’ve just put into sharpening.
Dry Thoroughly
Rinse stones well under clean running water to remove all slurry and metal particles that can harden on the surface.
How you dry and store them depends on the type of stone:
Diamond stones: Must be completely dried after use, as the metal substrate can rust if moisture is left on the surface. Wipe thoroughly with a dry cloth and allow to air-dry before storing.
Finishing stones (natural or synthetic): Always wipe clean and dry fully before storage to prevent mould, odour, or surface deterioration
Medium-grit soaking stones such as King Deluxe: These need to absorb water before use, but if you sharpen infrequently, avoid leaving them submerged for long periods—stagnant water can cause odour or mould growth. Instead, empty the water after use, rinse, and let them air-dry in a shaded, well-ventilated place.
In all cases, avoid rapid drying in direct sunlight or near heaters, as this can cause cracking or warping.
Tool Maintenance
Before storing chisels and plane blades, apply a light coat of camellia oil or another rust-preventive oil. This creates a thin barrier against humidity and skin oils, both of which can cause corrosion over time. Wipe the blades with a soft cloth first to remove fingerprints and any residual water, as even tiny droplets can leave rust spots.

Avoid Direct Sun
Prolonged exposure to direct heat or sunlight can cause stones to warp or crack, especially natural stones with uneven density. Store them in a cool, dry area away from heaters, windows, or car interiors. Consistent storage conditions help maintain the flatness and integrity of the stone’s surface.
Next in the Series
In Part 4, How to Sharpen Japanese Chisels (Nomi) – Understanding Uraoshi (Back Flattening) for Chisels, we’ll dive into uraoshi—the essential process of flattening the backside of a Japanese chisel. You’ll learn why a perfectly flat back is just as important as the bevel, how it affects sharpness and cutting accuracy, and step-by-step methods to achieve it. We’ll also cover common mistakes to avoid so your chisels can deliver clean, precise cuts every time.
Ready for structured, in-depth training?
Latest Posts
Precision Starts with a Single Line.
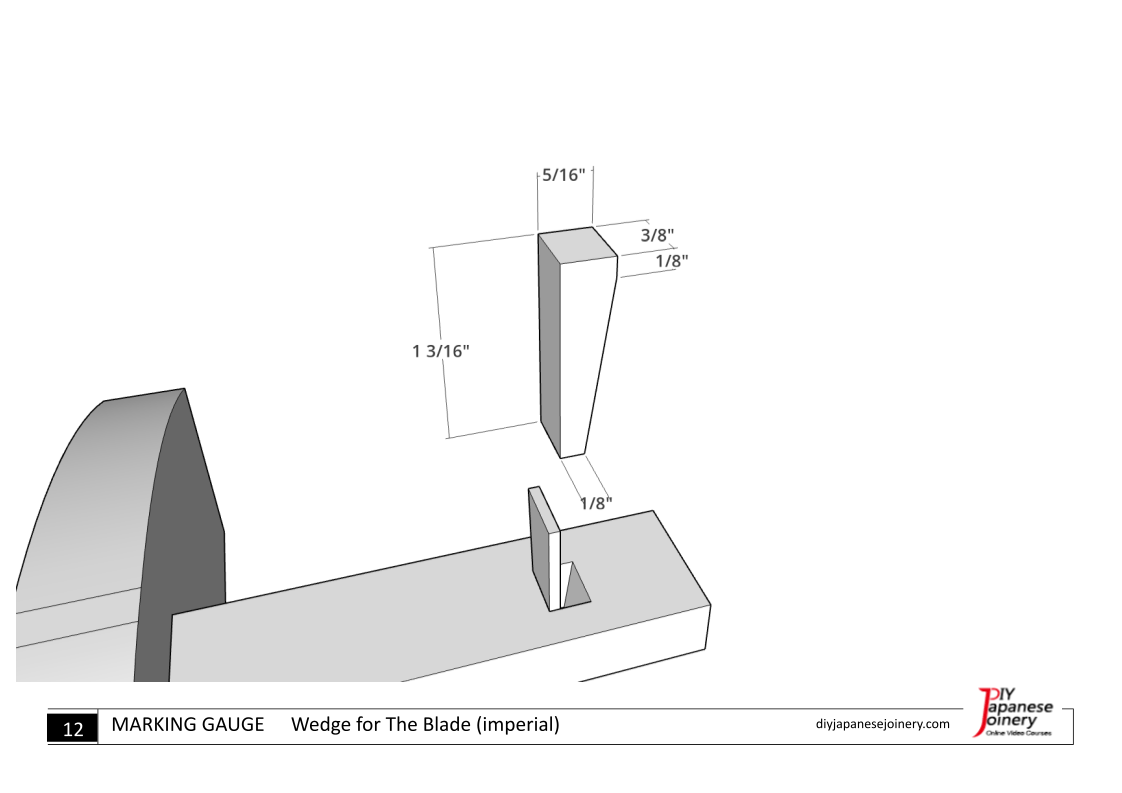
Get the detailed diagrams to craft your own Japanese marking gauge (Kehiki). Start your journey with the foundational tool of Japanese joinery.
Precision Starts with a Single Line.
Get the detailed diagrams to craft your own Japanese marking gauge (Kehiki). Start your journey with the foundational tool of Japanese joinery.
About me

Hi there, I’m Hisao Zen, a Japanese woodworking artisan with 25+ years’ experience. I share the techniques and traditions of joinery through online courses, guiding beginners step by step while inspiring them to carry this timeless craft into the future.
Latest Posts


©2017–2026 DIY Japanese Joinery
All pricing is in U.S. dollars.
Some images by Freepik