How to Sharpen Japanese Chisels (Nomi) – Understanding Uraoshi (Back Flattening) for Chisels
Last Updated: 24 Feb 2026
Introduction
Uraoshi is the traditional Japanese method of flattening the backside of a chisel, or nomi. This essential sharpening step ensures that the cutting edge is formed between a perfectly flat back and the bevel, producing an edge capable of making exceptionally clean and precise cuts. Without proper uraoshi, even the sharpest bevel will not deliver optimal performance.
Before you begin flattening, it helps to understand how traditional layout tools are structured and how precision is built from the marking stage.
Why the Back of a Japanese Chisel Must Be Perfectly Flat
In Japanese woodworking, a chisel’s performance depends not only on the sharpness of its bevel, but also on the condition of its back. That’s why uraoshi—the process of flattening and polishing the backside—is a core part of sharpening. A perfectly flat back is not simply a matter of appearance; it directly affects cutting performance, accuracy, and even the longevity of the edge.
Reason 1: Completely Remove Burrs
When sharpening on a medium-grit stone, a thin burr forms along the cutting edge. These burrs need to be removed on a finishing stone, but if the back is even slightly hollow or uneven, some of them will remain. Leftover burrs cause microscopic chips, dulling the blade faster and making the chisel feel less crisp in use.
Proper uraoshi ensures the burr is removed evenly along the entire edge, leaving it keen and ready for precise work.
Reason 2: Guide the Cut Accurately
The backside of a chisel functions as a built-in cutting guide. When paring or cleaning a joint, the back rides along the surface of the wood, directing the edge. If it’s not perfectly flat or straight, the chisel can wander off the intended line. This may not be obvious on rough work, but in fine joinery, even a fraction of a millimetre of deviation can ruin the fit. Flattening and polishing the back gives you full control, letting the chisel track straight and true.
By maintaining a perfectly flat back through careful uraoshi, you bring out the full potential of a Japanese chisel—sharp, accurate, and dependable. It’s one of those details that may seem minor, but in the hands of a skilled craftsman, it’s the difference between a tool that merely works and one that performs at the highest level.
Mastering uraoshi is part of a larger system of tool preparation and structural understanding.
What You’ll Need
#1200 diamond stone/plate (trusted flatness and durability)
A chisel around 30mm
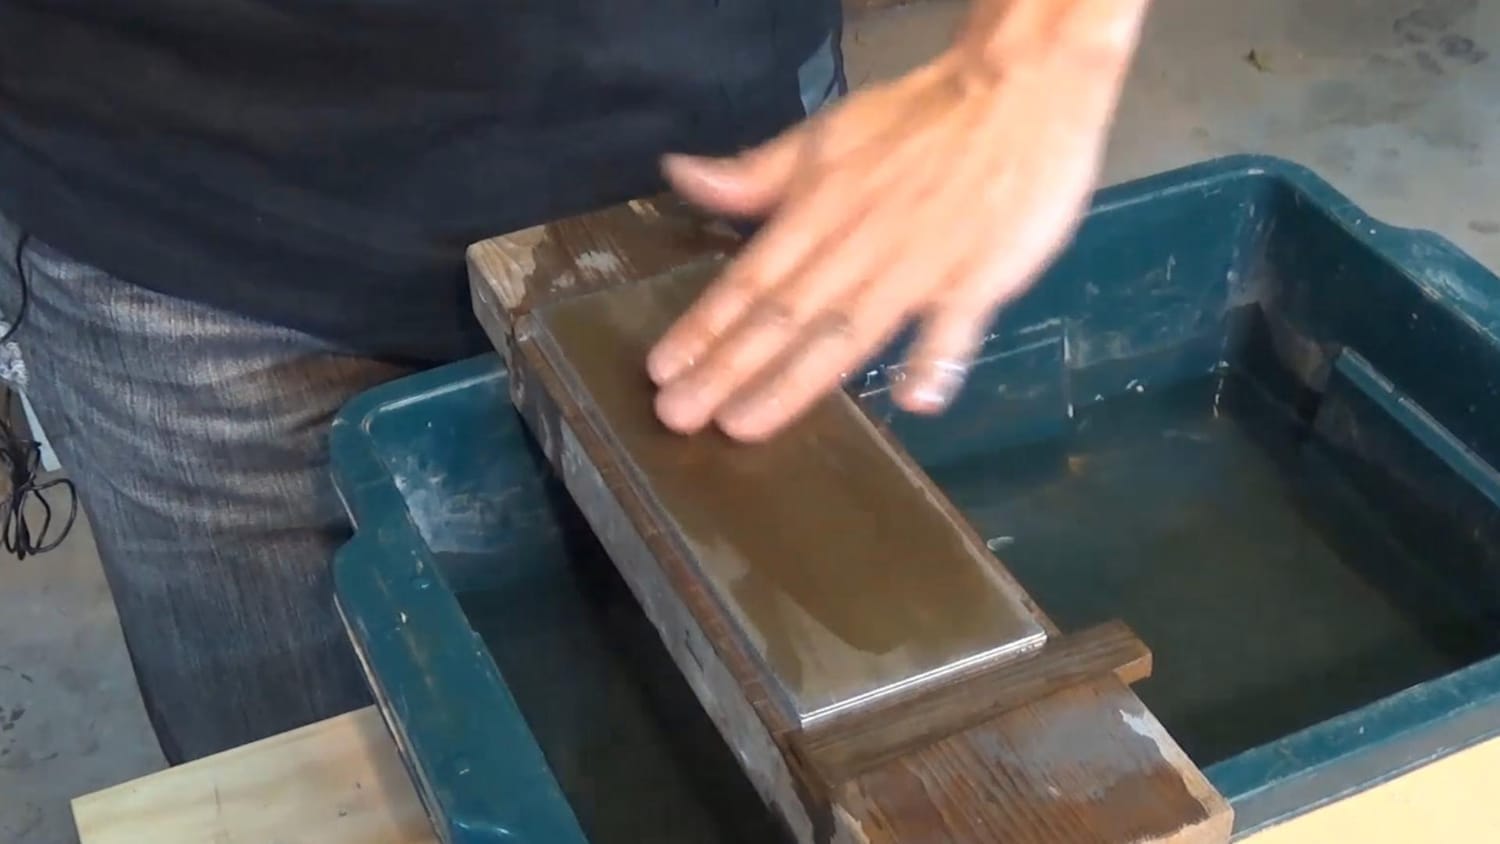
Non-slip support: either a stone holder, rubber mat, or wedge
Water (box/tub or sink), towel/rag
Optional: oil-based marker (for checking contact), straightedge/fluorescent light (for checking flatness)
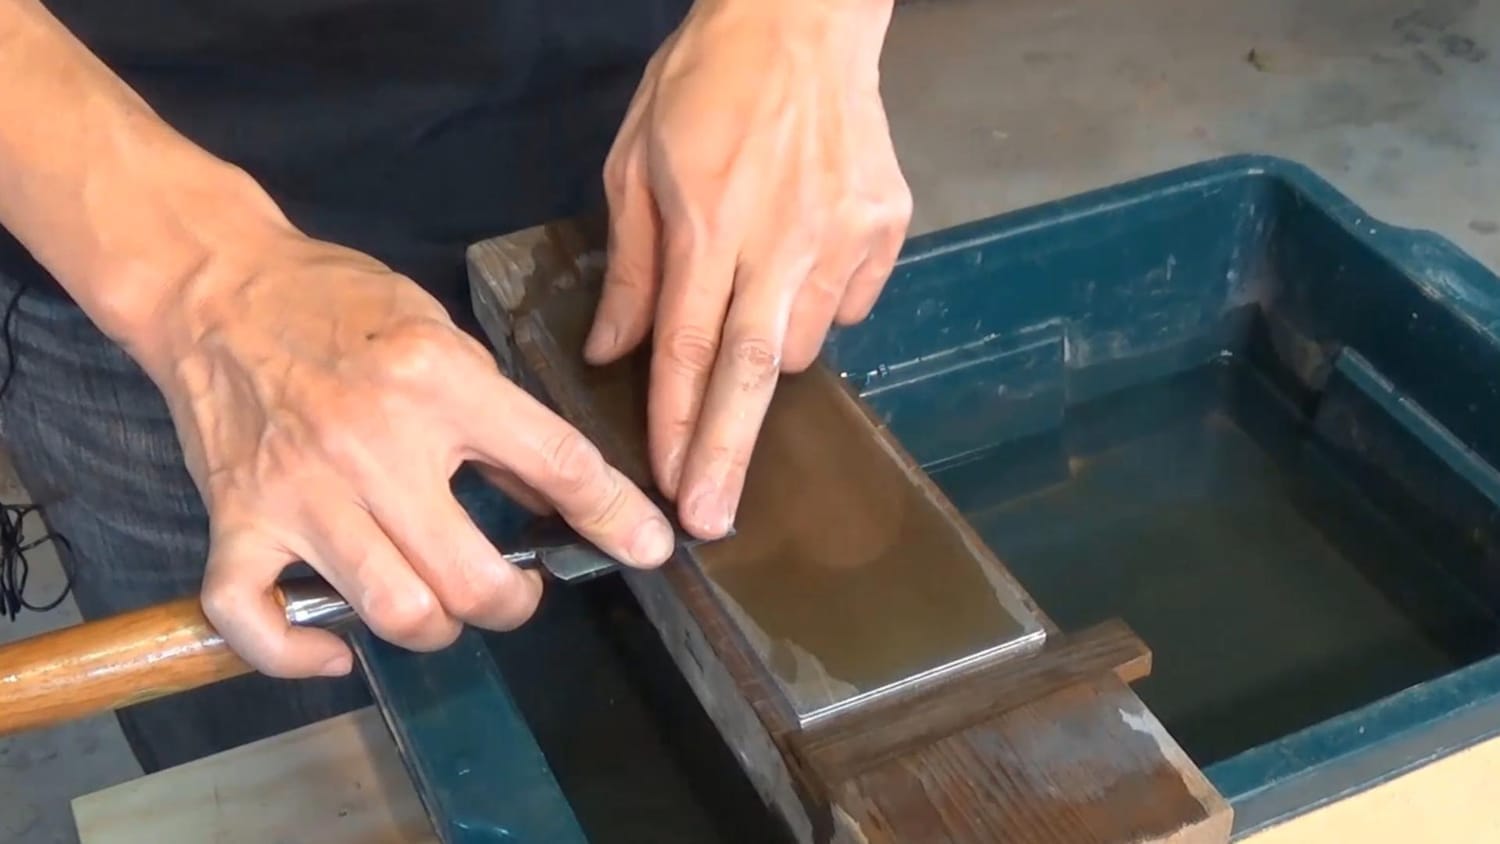
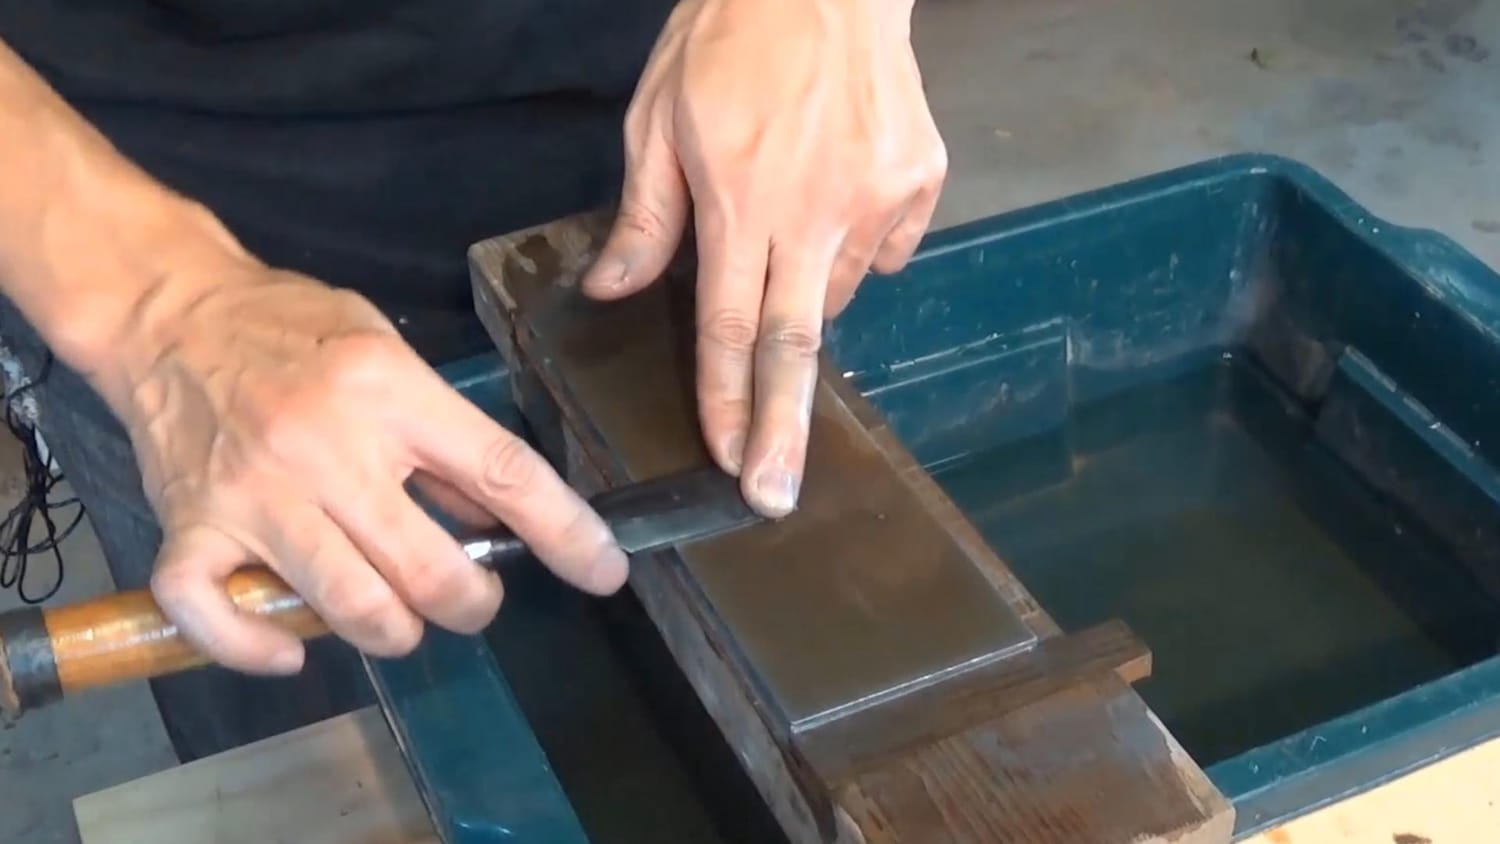
The Uraoshi Motion
Contact point—focus on the 5–6 mm near the edge: For beginners, it’s difficult to develop the habit of slightly lifting the neck of the blade, so keep the neck down and apply slightly stronger pressure toward the edge.
Stroke—short and back-and-forth: Use short forward–backward movements of 10–30 mm. At the same time, move slightly side to side so you use the entire surface of the stone (to prevent uneven wear).
Pressure distribution: Use roughly 70–80% of the pressure at the front (edge side) and 20–30% at the back (neck side). On the return stroke, slightly reduce the pressure to avoid digging in.
Grip: Hold the handle with your dominant hand and place two or three fingers of the other hand on the back of the blade to “lock” the surface.
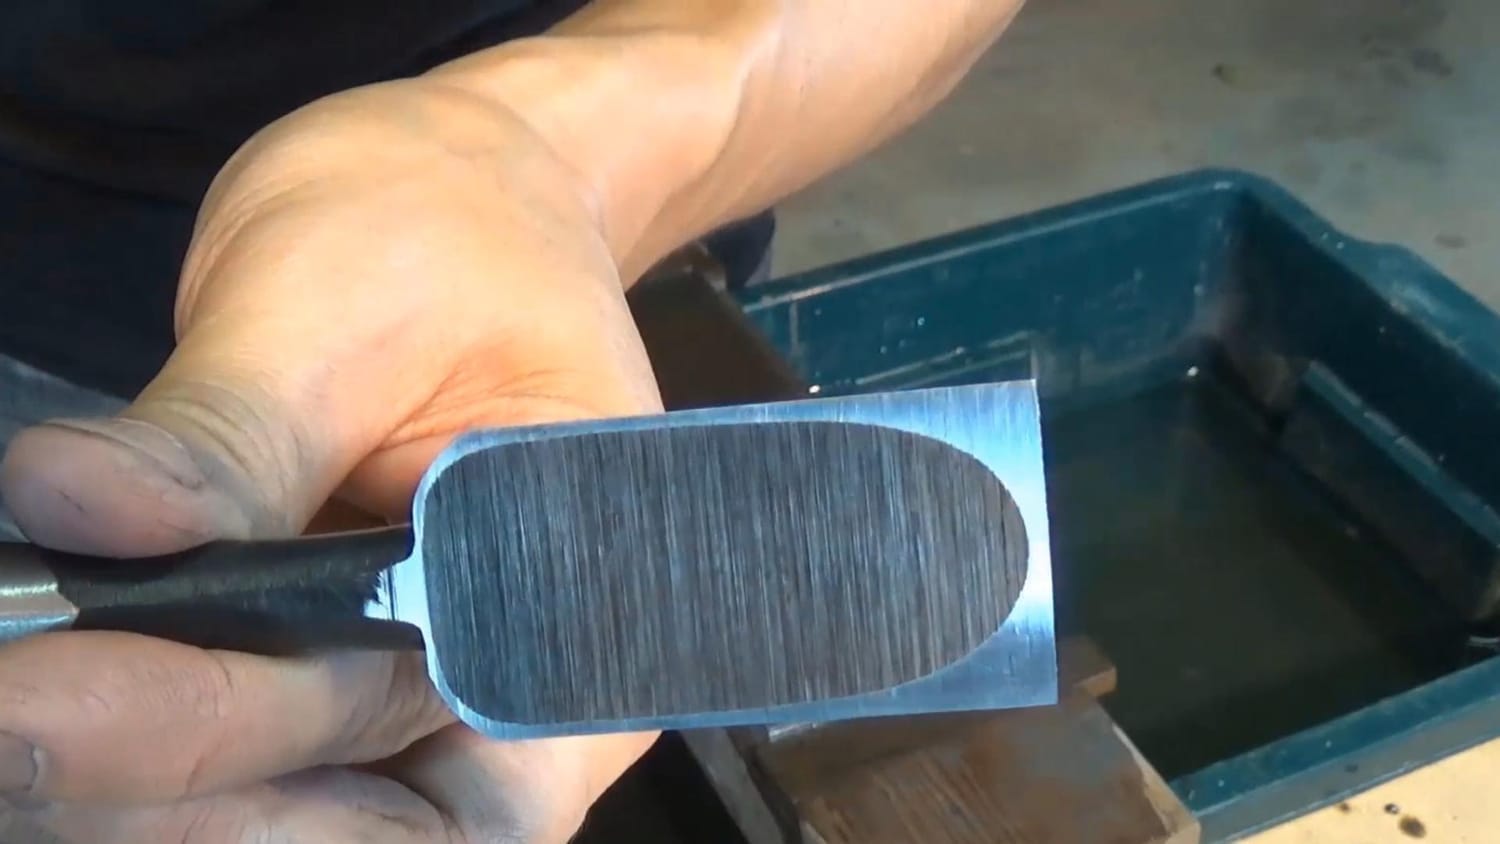
Step-by-Step Backside Flattening
Step 1: Create a water film
Spread a thin layer of water over the diamond’s surface. If there’s any grit or metal filings, rinse them off before starting.
Step 2: Create the initial contact
Focus on making contact with only the front 5–6 mm of the blade edge, and slowly begin short back-and-forth strokes.
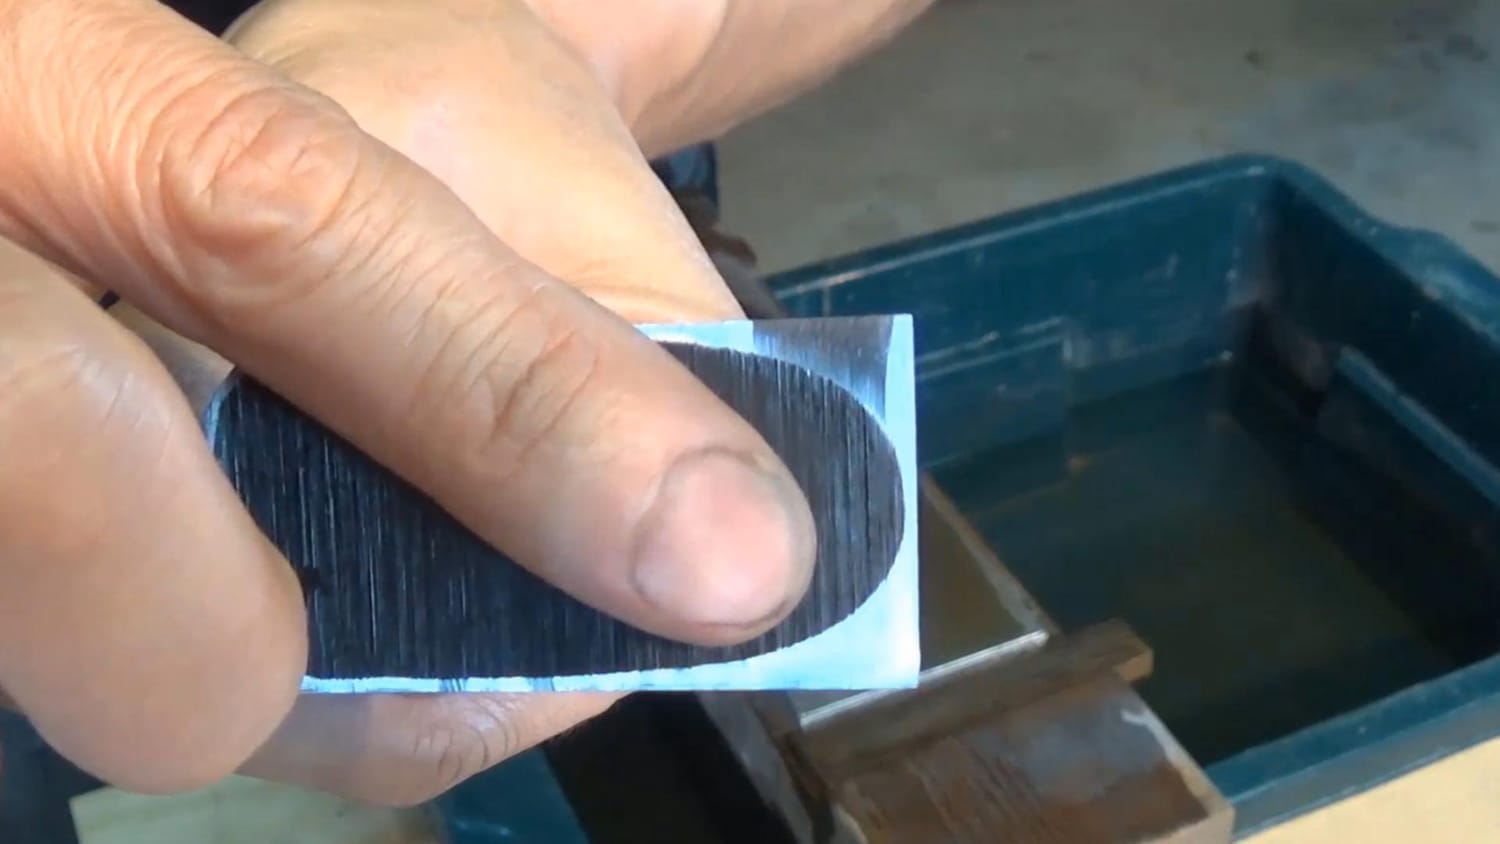
After every few strokes, lift the blade, rinse it with water, and check the reflection. If you see a thin, dull band (polished band) running straight across near the edge, you’re good to go.
Step 3: Even out across the width
Gradually shift the “lane” of your strokes from right → centre → left, so that a polishing band of the same width appears across the entire blade.
To avoid uneven wear on the stone, rotate it 180° from time to time.
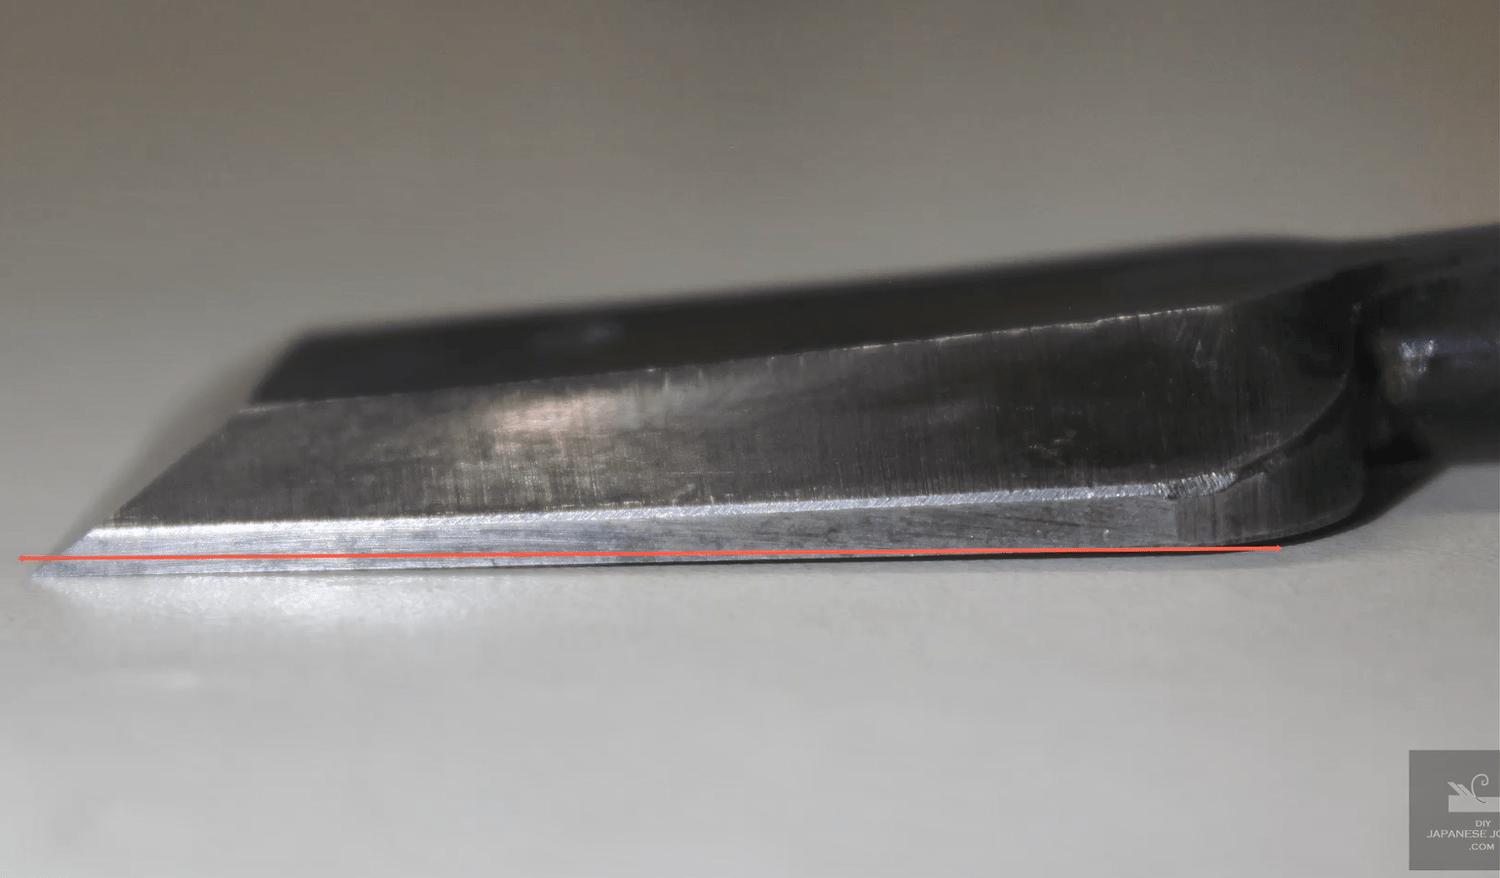
Step 4: Widen the polishing band just a little
While keeping the cutting edge as the focus, use the same motion to widen the polishing band by about 1–2 mm.
The important point here is that a slight angle on the surface will develop naturally (no need for the kind of exaggeration shown in the photo). This helps keep the steel (hagane) layer intact for longer, extending the blade’s lifespan.
Note: My master’s method involves lifting the neck slightly, but for beginners it’s enough not to lift the neck and simply apply more pressure toward the cutting edge. This makes it easier to keep the angle consistent.
Step 5: Slightly ease pressure at two-thirds
When the polishing band has widened to about two-thirds of the backside, slightly reduce the pressure on the cutting edge. From there, use back-and-forth strokes combined with sideways sliding to let the surface extend naturally.
Note: Avoid continuing to apply pressure on just one spot — this can cause uneven steps to form.
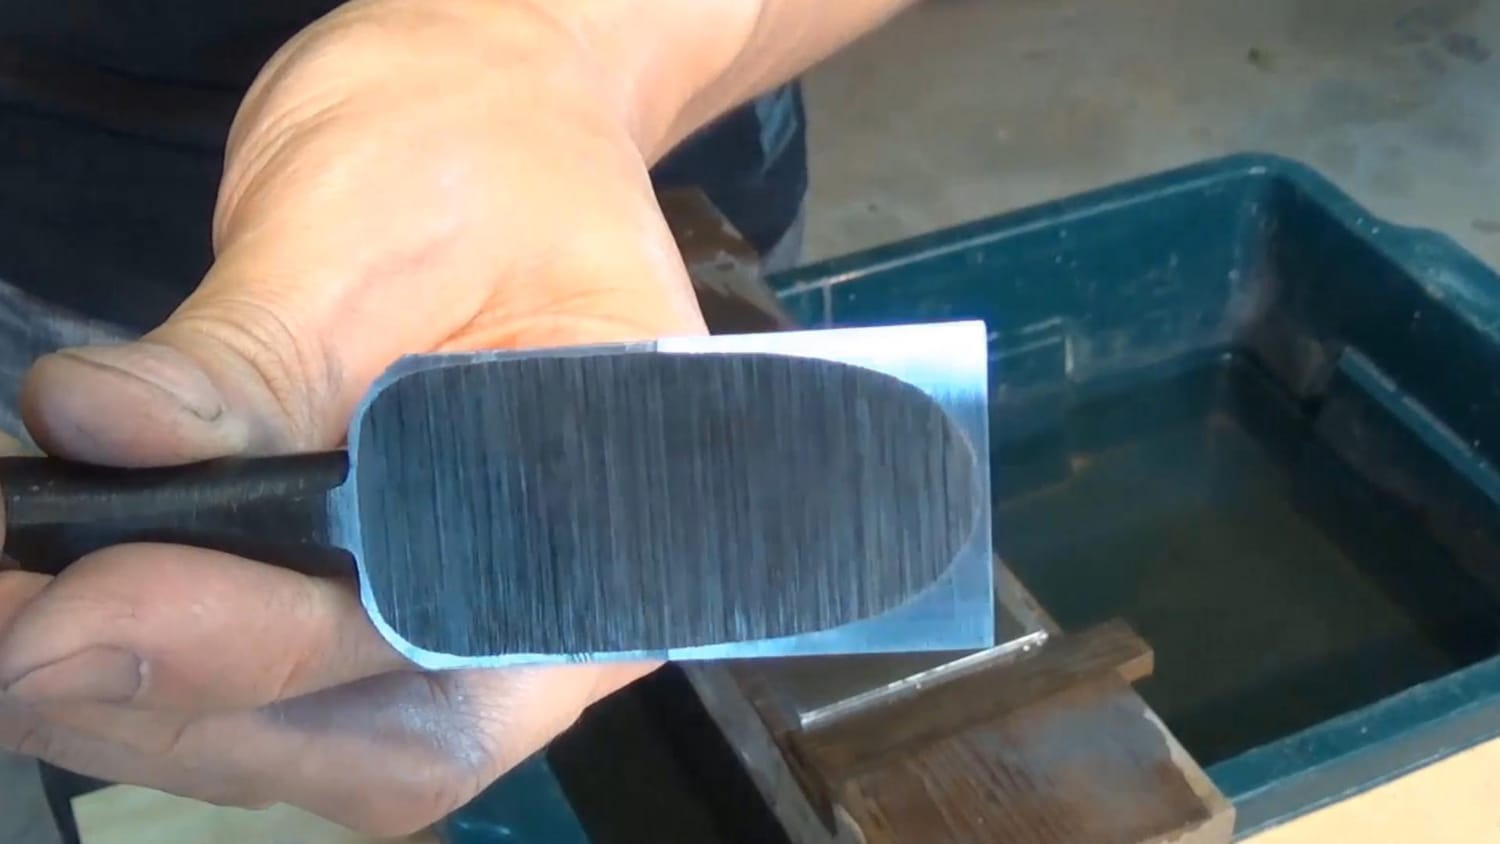
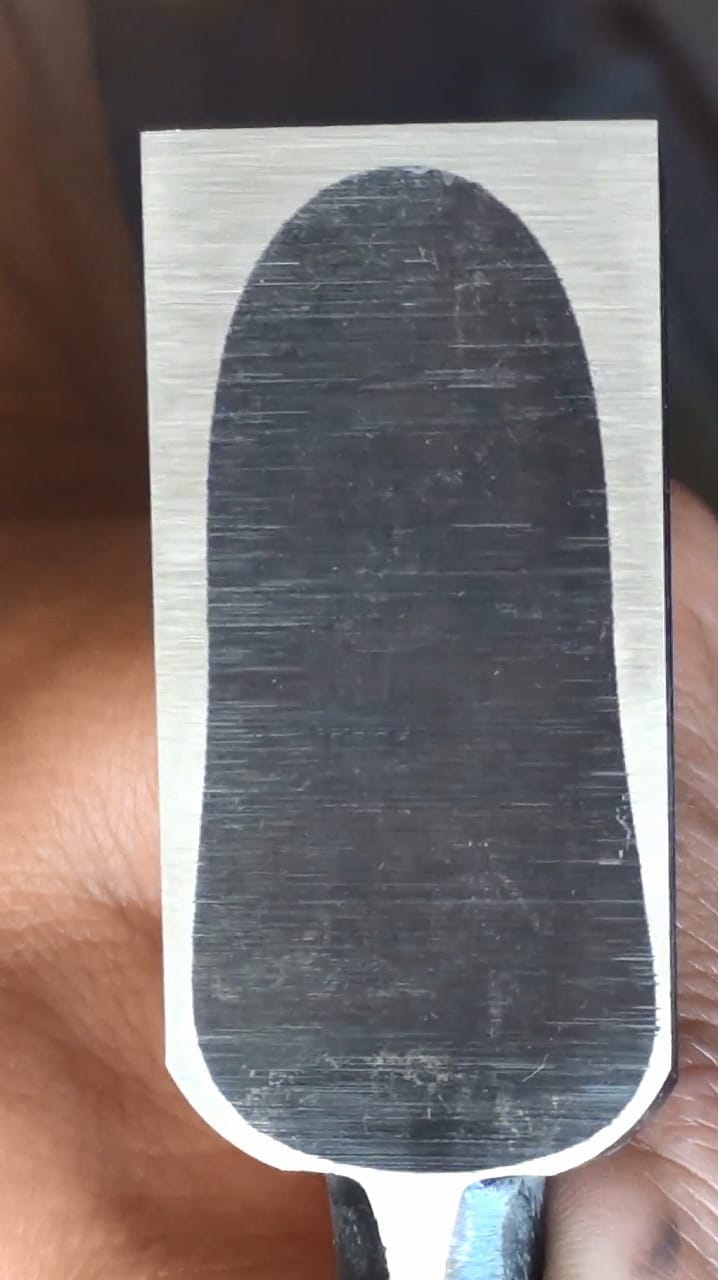
Step 6: Where to stop? (Completion criteria)
Practical standard: About 80% flat is sufficient (the remaining part can be addressed during use and refined in the next sharpening).
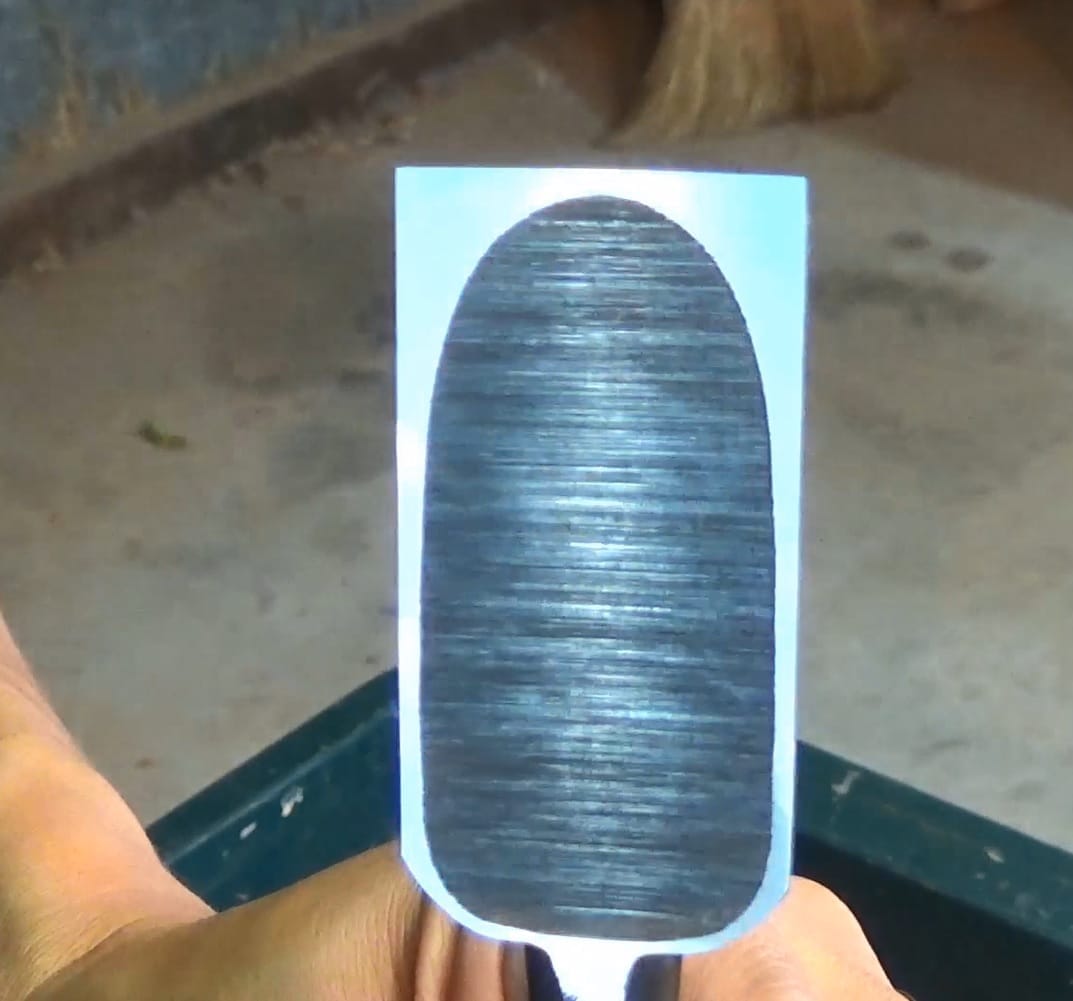
Ideal standard: A uniform reflection runs from the cutting edge to the neck. If the hollow on the backside (ura) remains evenly in an oval shape, it’s close to ideal.
Note: This section covers flattening only. Final finishing to remove scratches or completely eliminate burrs will be done next time.
Progress Checks (Tips for Monitoring Progress)
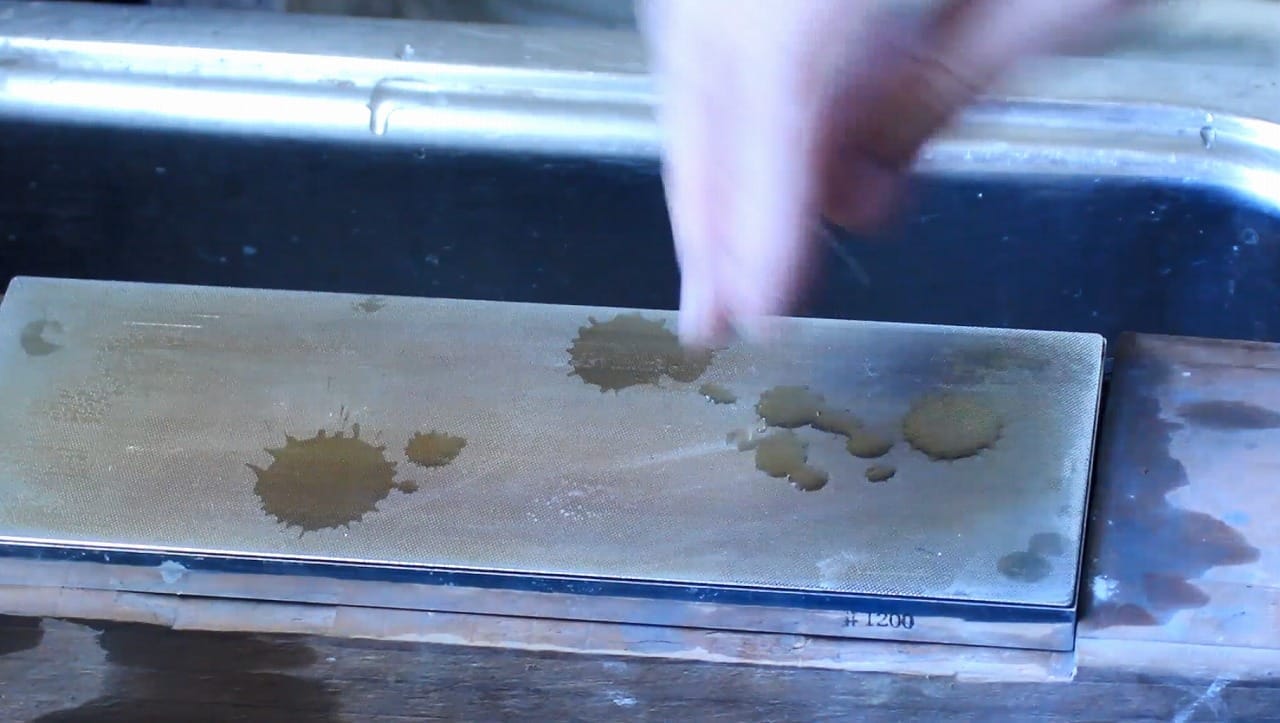
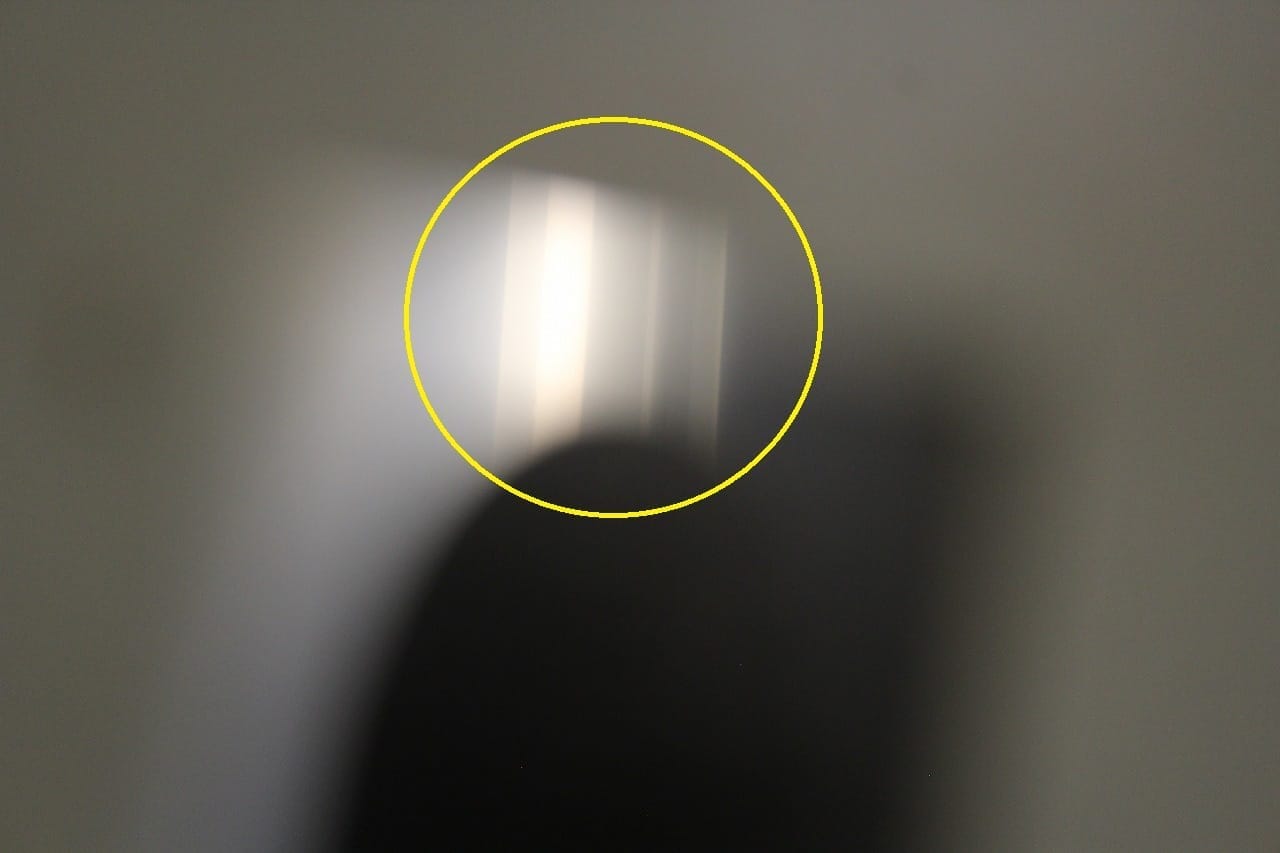
Check the reflection: Reflect fluorescent light or a straight light source on the surface—if the reflected image appears straight, the surface is flat.
Swarf lines: If the dark swarf lines on the diamond plate run continuously across the entire width, the cutting edge is making full contact with the surface.
Touch: Any “roughness” felt on the backside of the edge belongs to the finishing stage (next time). For now, evaluate only the continuity of the flattened band.
Troubleshooting (Common Mistakes and Solutions)
Only one side of the width contacts quickly: Your body is leaning to one side. Switch the stroke lane and rotate the stone 180°.
Step forms: You’ve gone back and forth too much in the same spot. Keep sliding side to side at all times.
Next in the Series
In Part 5, How to Polish the Backside of a Chisel with a Finishing Stone, we’ll move on to polishing the back of a chisel with a finishing stone. This step brings out a mirror-like surface that not only looks impressive but also ensures the edge meets the wood with minimal resistance. By refining the back, you’ll unlock the full cutting potential of your chisel.
Ready for structured, in-depth training?
Latest Posts
Precision Starts with a Single Line.
Get the detailed diagrams to craft your own Japanese marking gauge (Kehiki). Start your journey with the foundational tool of Japanese joinery.
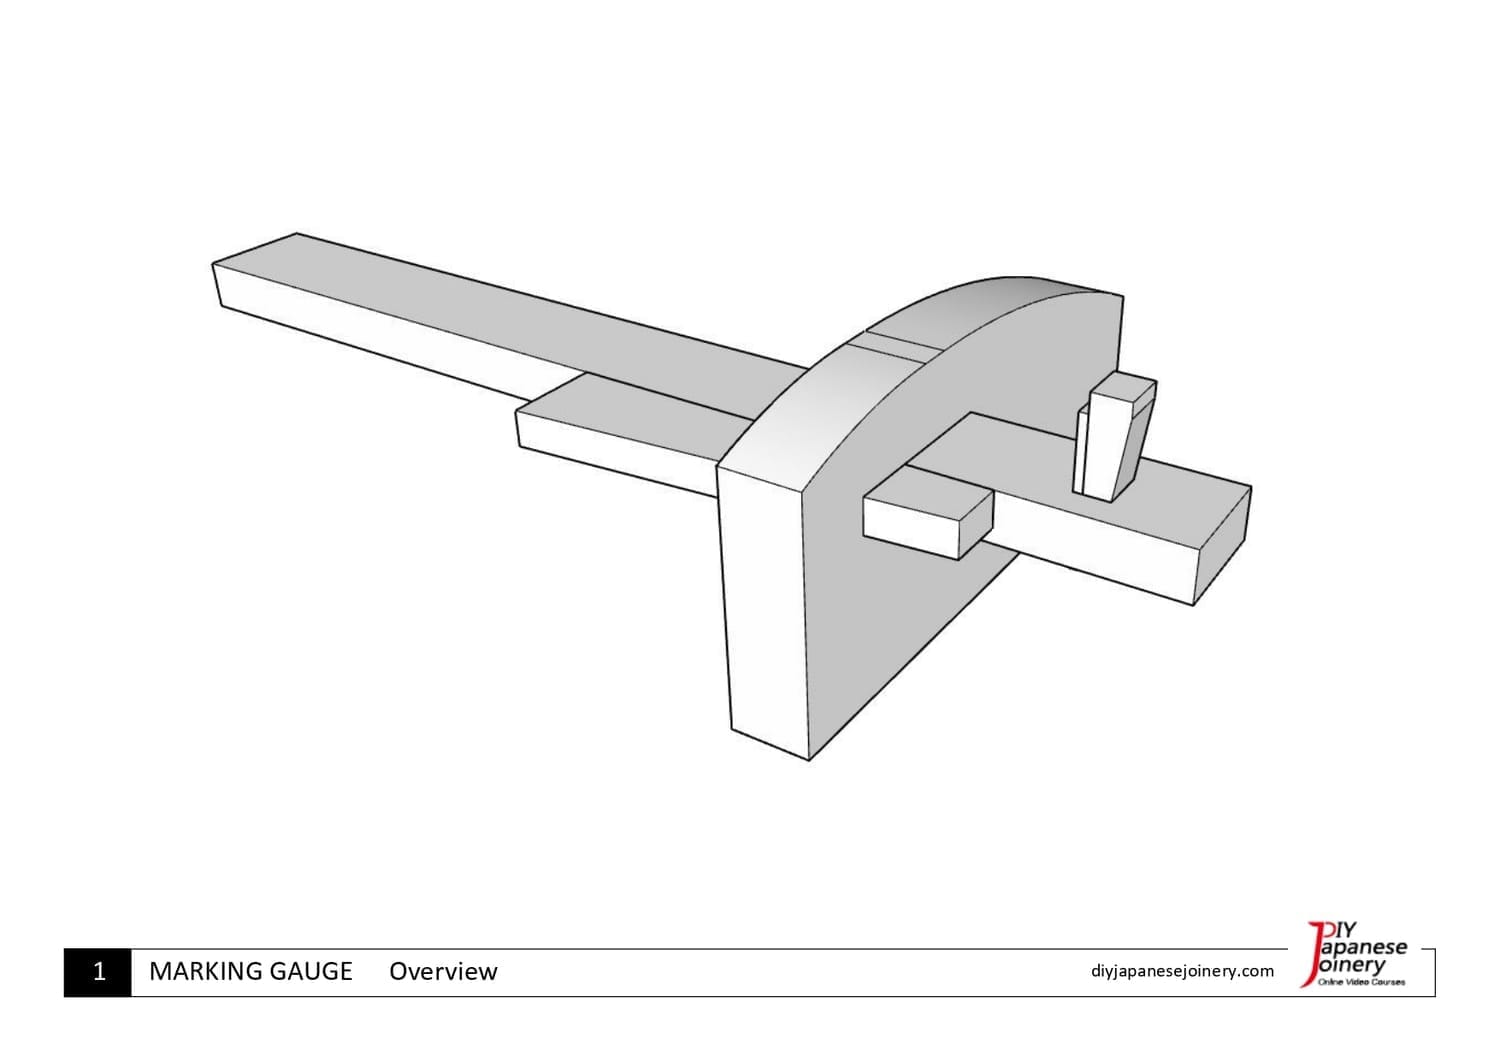
Precision Starts with a Single Line.
Get the detailed diagrams to craft your own Japanese marking gauge (Kehiki). Start your journey with the foundational tool of Japanese joinery.
About me

Hi there, I’m Hisao Zen, a Japanese woodworking artisan with 25+ years’ experience. I share the techniques and traditions of joinery through online courses, guiding beginners step by step while inspiring them to carry this timeless craft into the future.
Latest Posts


©2017–2026 DIY Japanese Joinery
All pricing is in U.S. dollars.
Some images by Freepik