How to Polish the Backside of a Chisel with a Finishing Stone
Last Updated: 22 Aug 2025
Introduction
In the last article, we looked at how to flatten the backside of a chisel with a diamond stone. This time, we’re taking the process one step further: polishing the backside with a finishing stone. This is where your chisel truly begins to shine—literally.
When sharpening Japanese chisels, many beginners focus only on the cutting edge. Yet the backside of the blade is just as important. Without a polished and flat backside, the tool can never reach its full potential. In this article, I’ll walk you through the polishing process with a finishing stone—a crucial step for achieving razor-sharp results.
Why the Backside Matters
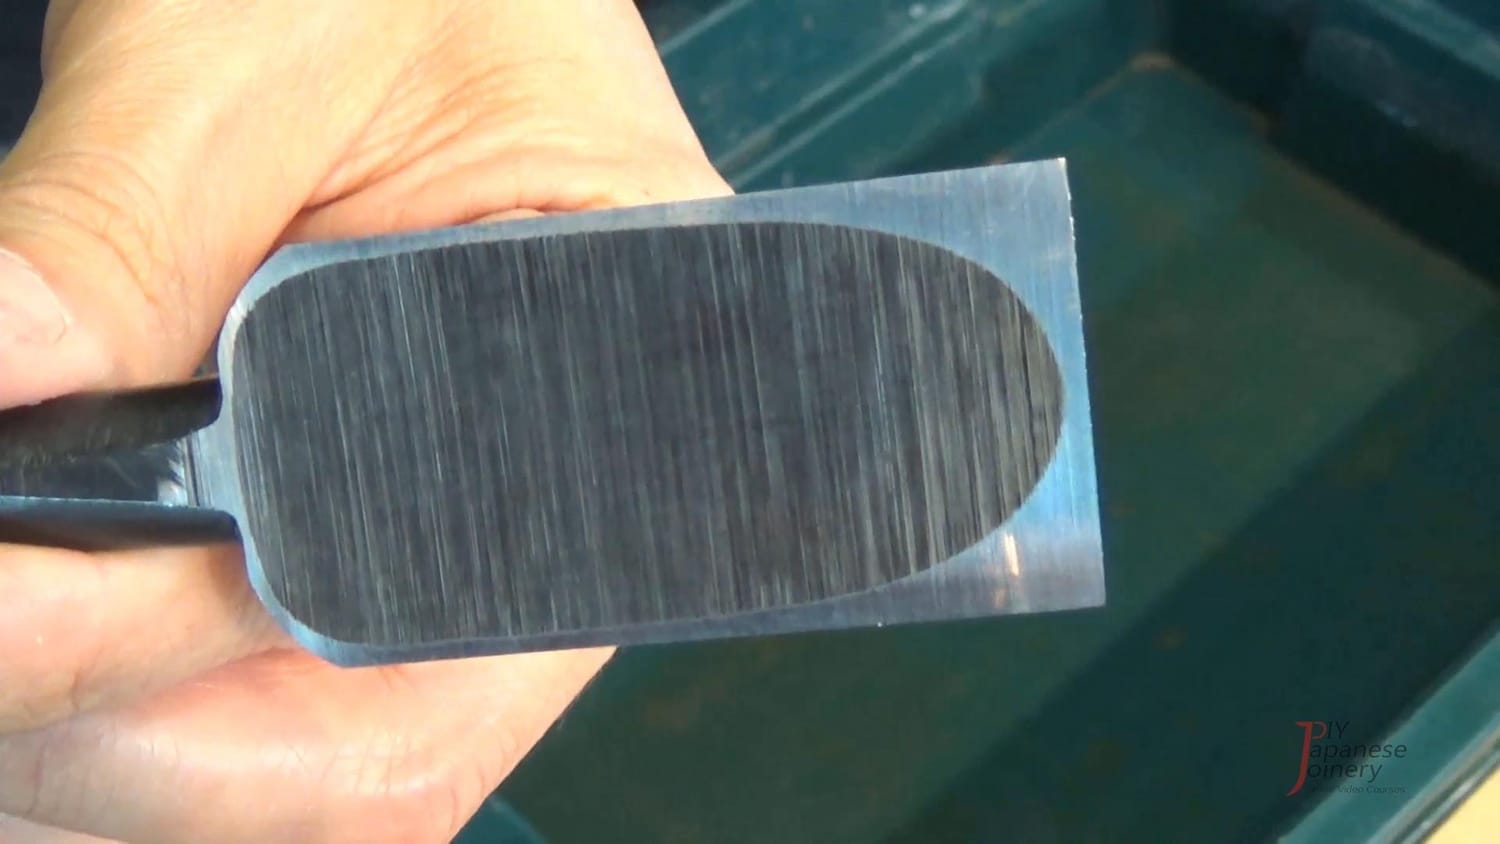
The backside of a chisel acts as the reference face when cutting. If it’s scratched, rounded, or uneven, the edge won’t meet the wood cleanly. After grinding with a diamond stone, the blade often develops micro-scratches and a saw-toothed cutting edge. These scratches must be removed to eliminate burrs and to prepare the blade for fine woodworking.
Step 1: Prepare the Finishing Stone
Place your finishing stone on a stable platform so that it doesn’t shift while you work. A finishing stone is designed with an extremely fine grit, capable of transforming a scratched chisel surface into a mirror-like polish.
However, before it can do its job properly, the stone itself needs to be prepared. Even brand-new finishing stones can have slight unevenness or glazing on the surface, which will prevent you from achieving consistent results.
To prepare the stone, begin by flattening its surface with a #400 diamond stone. Pour a small amount of water onto the finishing stone to act as a lubricant, then place the diamond plate on top.
Move it gently back and forth in straight strokes, applying light and even pressure. You’ll notice a thin slurry forming as the abrasive particles are released. This helps smooth the surface and ensures the finishing stone will cut evenly.
For best results, lift the diamond plate occasionally, rinse away the mud, and continue. Be sure to rotate the diamond plate from time to time so that wear is distributed evenly across its surface.
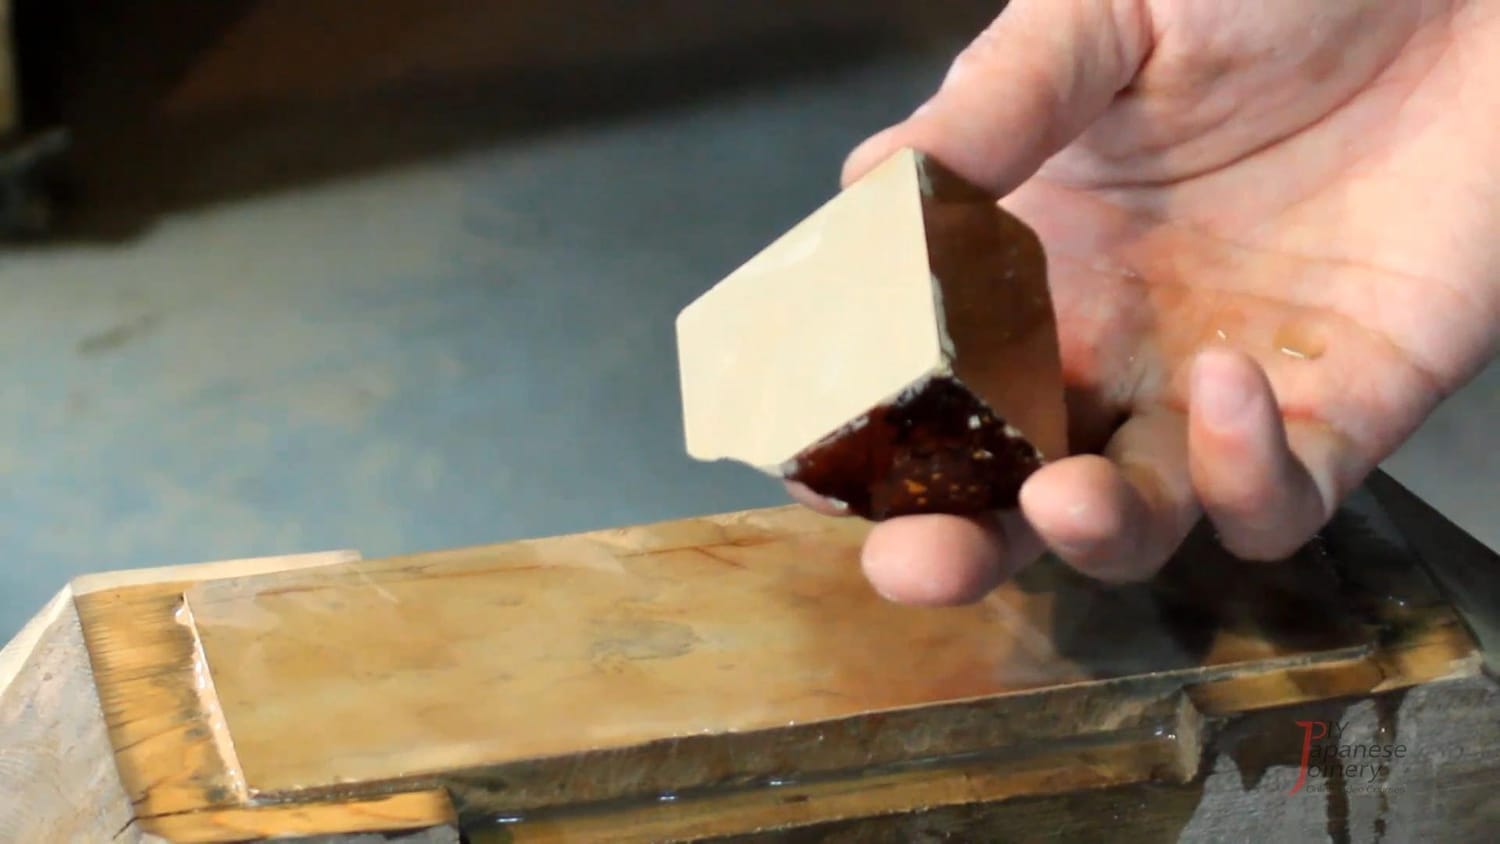
Step 2: Dress the Stone with Nagura
Next, use a Nagura stone (a type of dressing stone) to create a slurry on the surface of the finishing stone. The Nagura is traditionally used in Japanese sharpening to condition the stone before polishing, and its role is often underestimated by beginners. By rubbing it across the finishing stone, you not only prepare the surface but also release fine particles that are essential for effective sharpening.
As you work the Nagura across the stone, you’ll notice a creamy, slightly cloudy liquid beginning to form. This is the slurry, and it’s the heart of the polishing process. Unlike plain water, which simply acts as a lubricant, the slurry carries ultra-fine abrasive particles that gradually break down into even smaller fragments as you continue sharpening. The longer you polish, the finer these particles become, producing a smoother and more refined finish.
Think of the slurry as a cushion between the chisel and the stone. It allows the blade to glide smoothly while still being abraded at a microscopic level. This prevents deep scratches and instead creates the glossy, mirror-like surface that Japanese woodworking tools are famous for.
One tip: don’t rush the slurry-making stage. Many beginners make the mistake of rinsing it away or adding too much water. Keep the slurry concentrated and creamy.
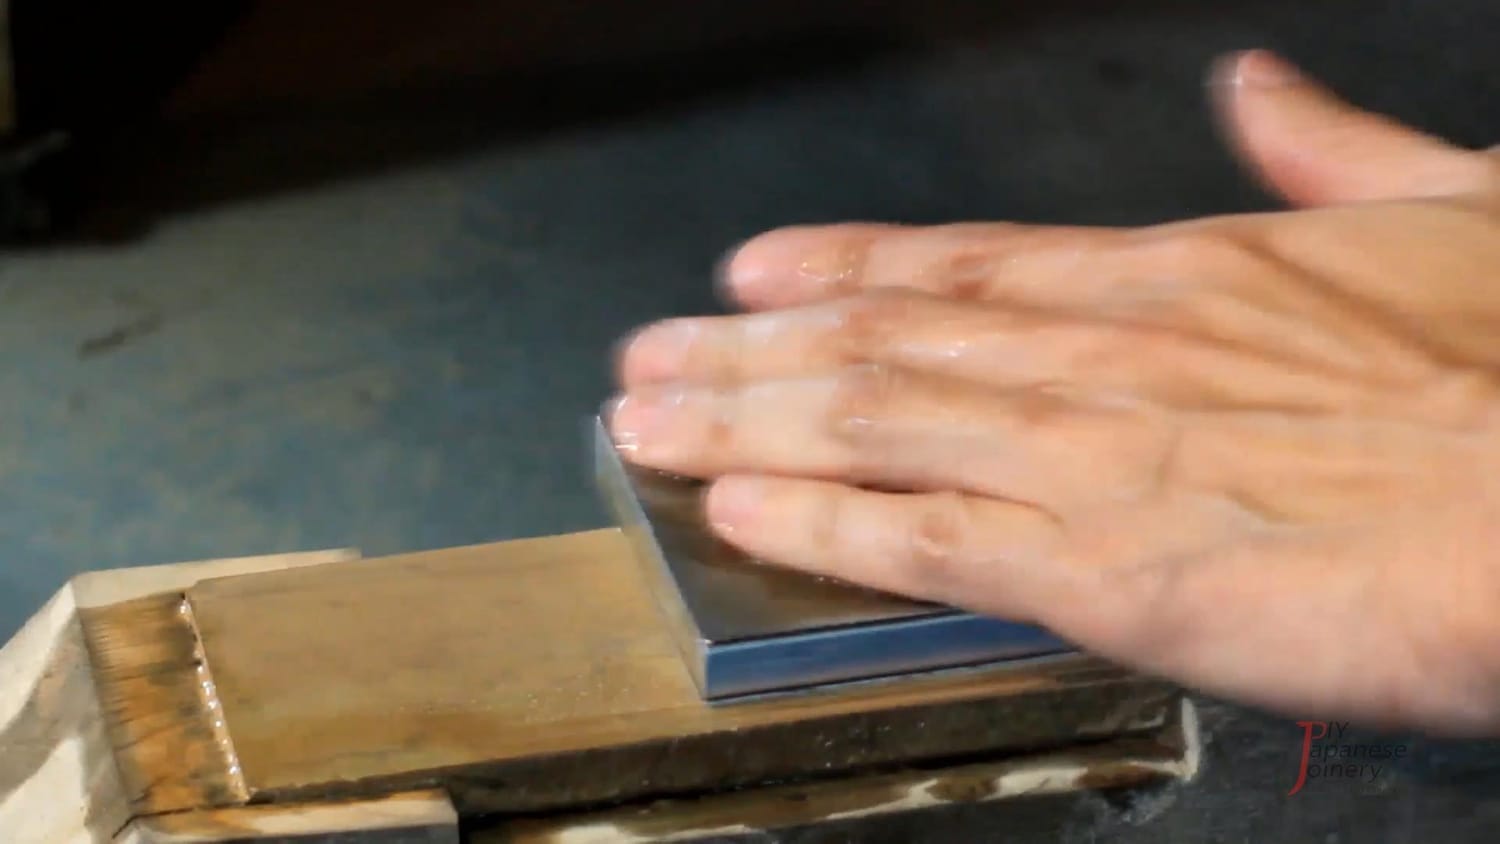
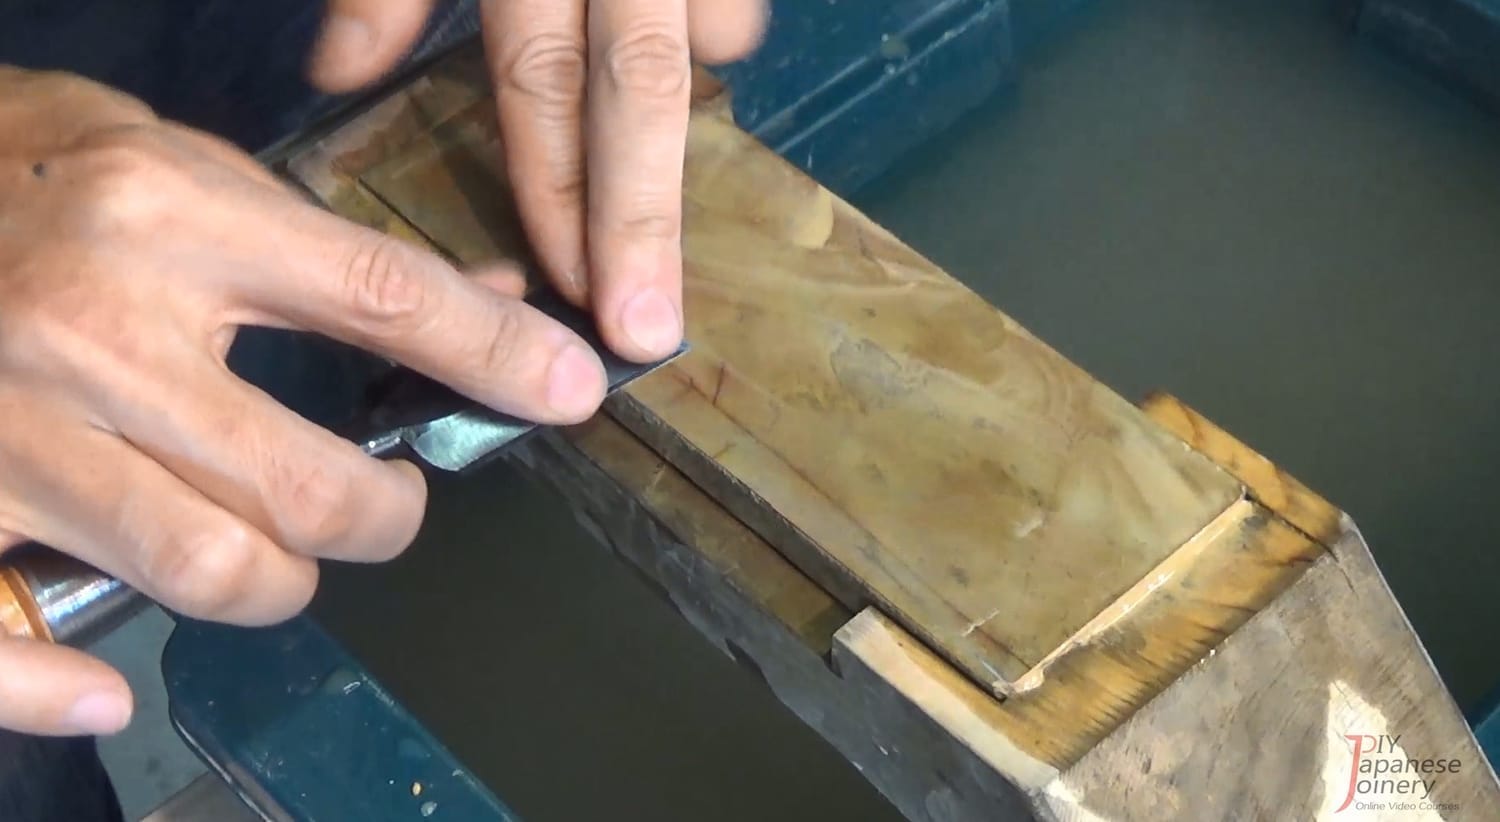
Step 3: Polishing the Backside
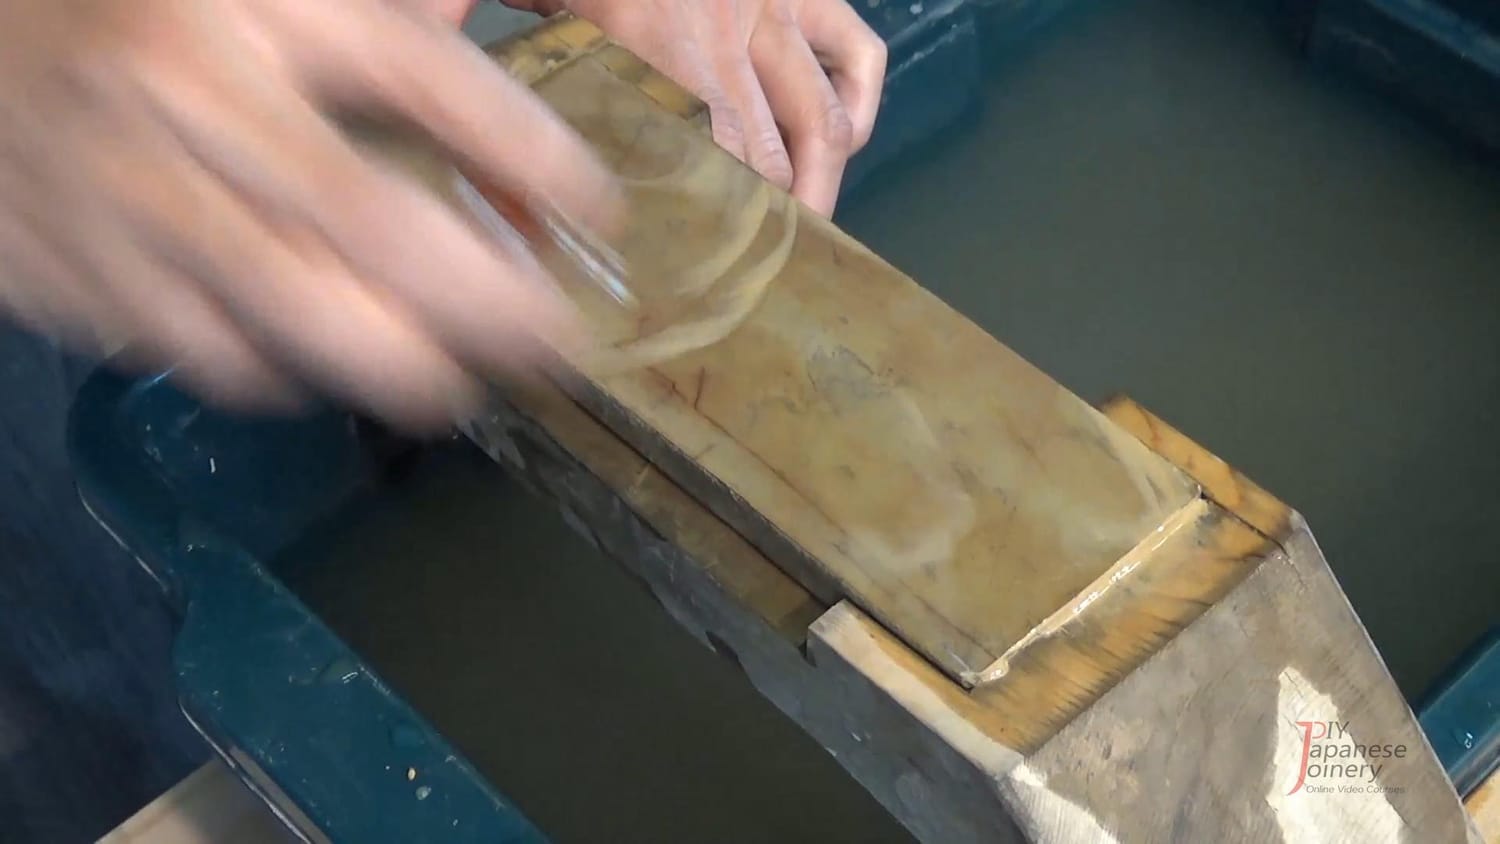
Now, place the chisel’s backside flat on the stone and gently slide it back and forth. Make sure the entire back is in full contact with the stone’s surface—if the angle shifts even slightly, you risk rounding the edge instead of keeping it flat. Apply only the lightest pressure. Remember, it is the slurry doing the work, not brute force. Too much pressure can dig into the stone unevenly, wear it prematurely, and even scratch the blade rather than polish it.
Keep your strokes smooth, even, and controlled. Many craftsmen prefer longer strokes that extend across the entire surface of the stone, ensuring uniform abrasion. Others recommend shorter strokes combined with side-to-side movement to prevent creating grooves. Either method works, as long as you maintain consistent contact and avoid rocking the blade.
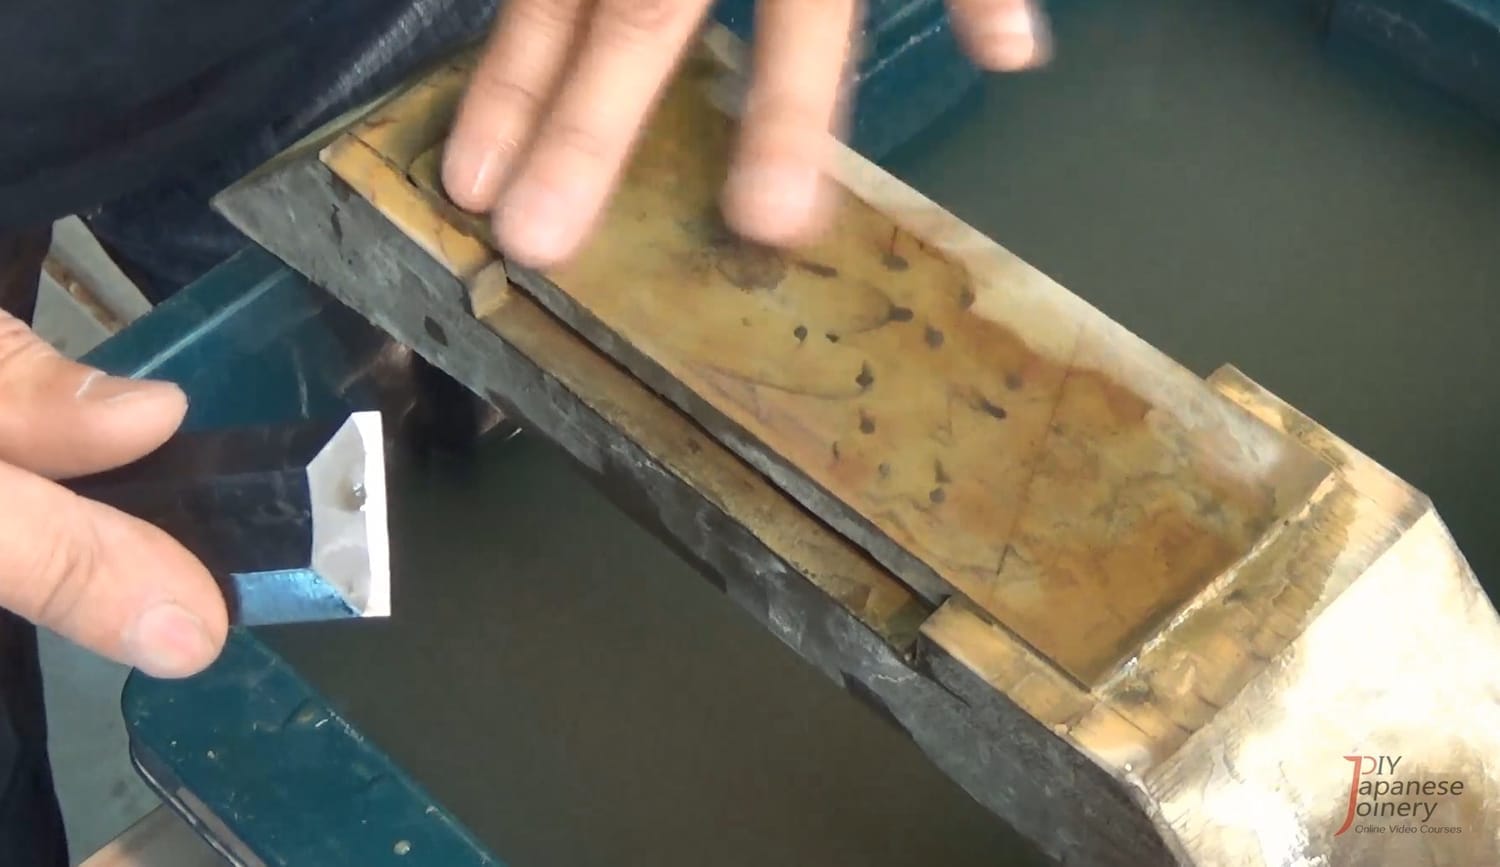
As you continue polishing, you’ll notice darker streaks forming in the slurry. These streaks are tiny metal particles mixing with the abrasives, and they are a good sign—it means the surface of the blade is being refined. At the same time, the abrasive particles themselves are gradually breaking down into finer grit, which gives the chisel its final smooth finish.
If you feel the stone starting to dry out, lightly moisten it with your fingertips. Just a drop or two is enough to keep the slurry active. Avoid adding too much water, because excess moisture will dilute or wash away the slurry, reducing its effectiveness. Some craftsmen even prefer to let the slurry become slightly sticky, as this condition can bring out the highest polish.
Patience is key here. Polishing with slurry is not about speed but about consistency. A steady rhythm, light touch, and awareness of the slurry’s condition will give you the mirror finish that defines a properly sharpened Japanese chisel.
Step 4: Checking for Flatness
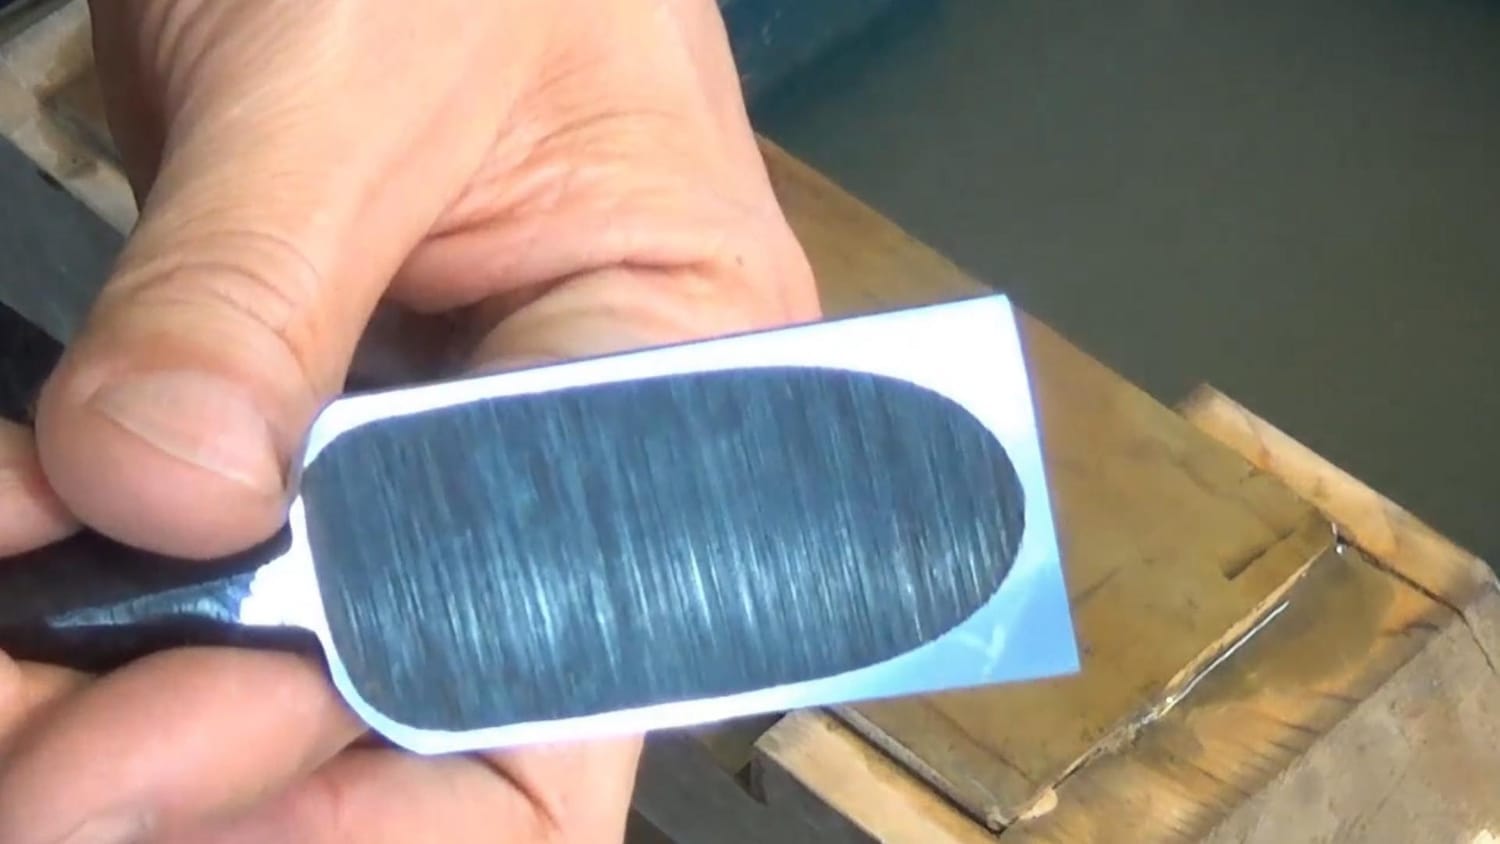
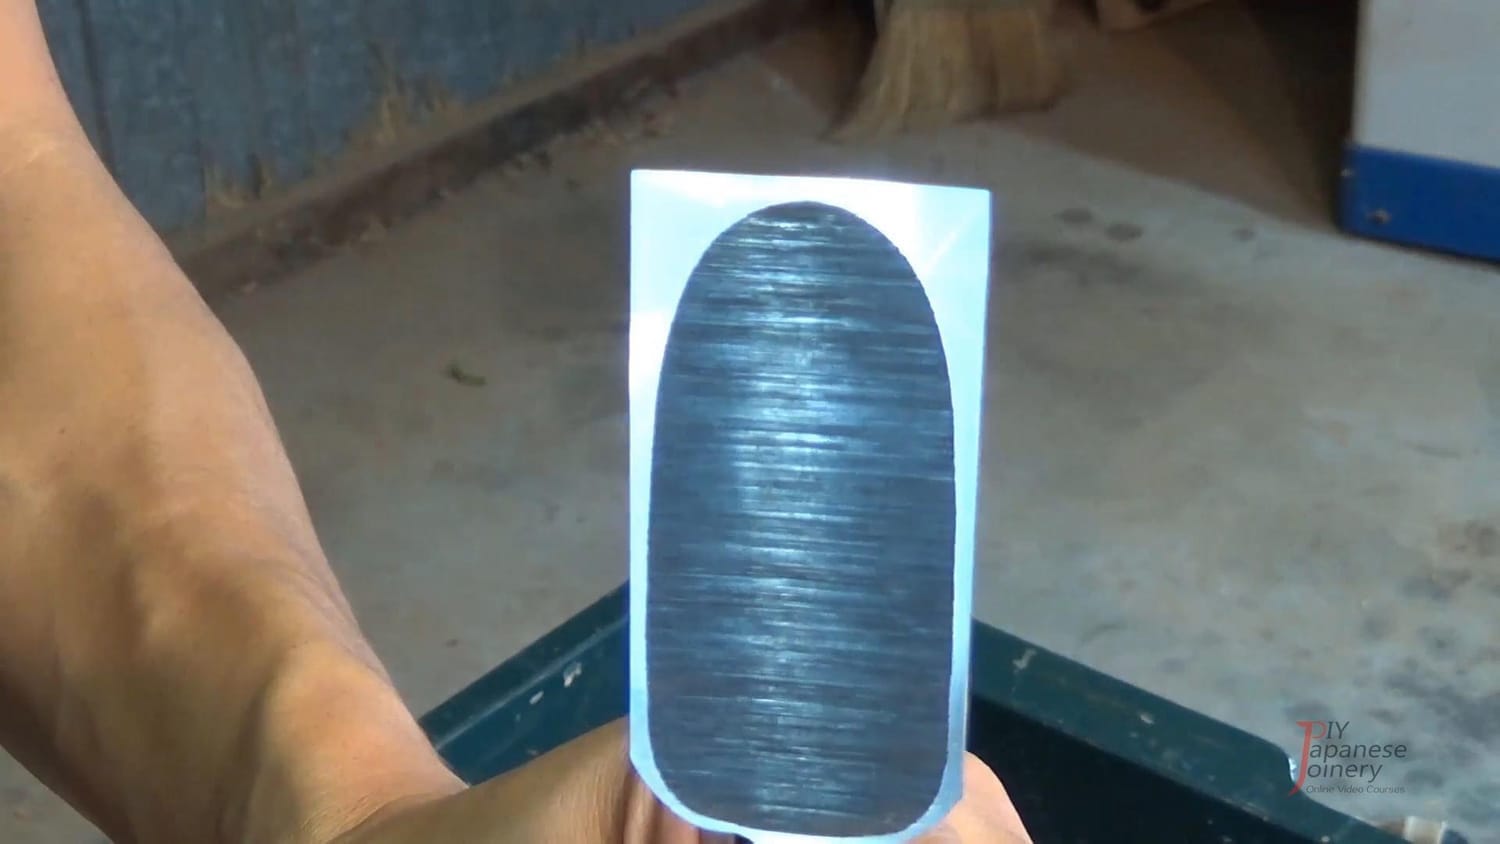
After several minutes of careful polishing, you’ll notice the backside of the chisel beginning to shine with a smooth, almost mirror-like surface. This is an encouraging sign, but don’t assume the job is done just because it looks glossy. Flatness is far more important than shine. A chisel that gleams but isn’t perfectly flat will still perform poorly in joinery, as even the smallest hollow or high spot will affect how the edge meets the wood.
So, how do you know if it’s truly flat? One simple and reliable trick is to reflect a fluorescent tube—or any long, straight light source—onto the polished surface. Hold the blade so the light reflects back at you. If the reflection of the tube appears perfectly straight, that tells you the backside is flat across its length. If the reflection wavers, bends, or appears broken, it means there are slight inconsistencies that need to be corrected.
This method is widely used by professional craftsmen because it provides an immediate visual cue that the human eye can detect far more easily than trying to “feel” flatness by touch. It’s a low-tech but highly effective approach.
If you do notice distortion in the reflection, don’t be discouraged. Simply return to the diamond stone and re-flatten the backside before coming back to the finishing stone. Think of it as retracing your steps—annoying, perhaps, but necessary to achieve a truly accurate surface. With practice, you’ll find you need fewer repetitions because your technique will naturally improve.
In short, don’t judge success by shine alone. A mirror finish is beautiful, but it’s the combination of mirror polish and perfect flatness that makes a chisel trustworthy in fine woodworking.

Before and After: The Mirror Finish
Comparing the chisel before and after polishing reveals a dramatic difference. At first, the backside may have been covered with fine scratches left behind by the diamond stone, giving it a dull, uneven appearance. But after careful polishing on the finishing stone, that same surface transforms into a brilliant mirror finish.
This mirror-like polish does far more than just look impressive. It greatly improves the sharpness of the cutting edge by ensuring that the blade’s geometry is true and consistent. A sharp edge without a flat, polished backside is incomplete—the edge will crumble faster and won’t slice cleanly. By contrast, a mirror-polished backside supports the edge, giving it strength and stability.
In traditional Japanese woodworking, achieving this mirror polish is seen as a mark of care and dedication. It’s not just maintenance—it’s part of the craft. A well-polished chisel embodies both function and beauty, reflecting the pride of the woodworker who prepared it.
Side-by-side comparison photo: scratched chisel backside vs. polished mirror finish.
How Often Do You Need to Flatten the Backside?
The good news is, once you’ve flattened the backside properly, you won’t need to repeat the entire process very often. For most woodworkers, the flatness will hold for about six months under regular use. This is because the backside of a chisel, unlike the cutting edge, does not wear down as quickly. Once it has been brought to a true flat surface, it generally stays that way as long as you treat the tool with care.
This is why it’s so important to do a careful job the first time. Rushing through flattening may leave tiny hollows or high spots that will only become more noticeable with use, forcing you to go back and redo the whole process sooner than expected. A properly prepared surface, on the other hand, saves you a great deal of time in the long run. Precision now means less frustration later.
Of course, the actual interval can vary. If you use your chisels heavily every day, especially on harder timbers, you might need to refresh the backside a little more often. On the other hand, if your chisels are used occasionally and stored properly, the polished backside can stay in excellent condition for far longer than six months.
In short, flattening the backside is an investment. Do it right once, and you build a foundation of accuracy that will support every sharpening session and every woodworking project that follows.
Next in the Series
In Part 6, How to Sharpen the Bevel Side of a Japanese Chisel, we’ll move from the backside to the bevel side. Although the bevel may look sharp from the grinder, it still lacks a true cutting edge. We’ll cover how to use a medium-grit stone to form the edge, generate and detect burrs, and then remove them with a finishing stone for a truly sharp chisel.
Ready for structured, in-depth training?
Latest Posts
Precision Starts with a Single Line.
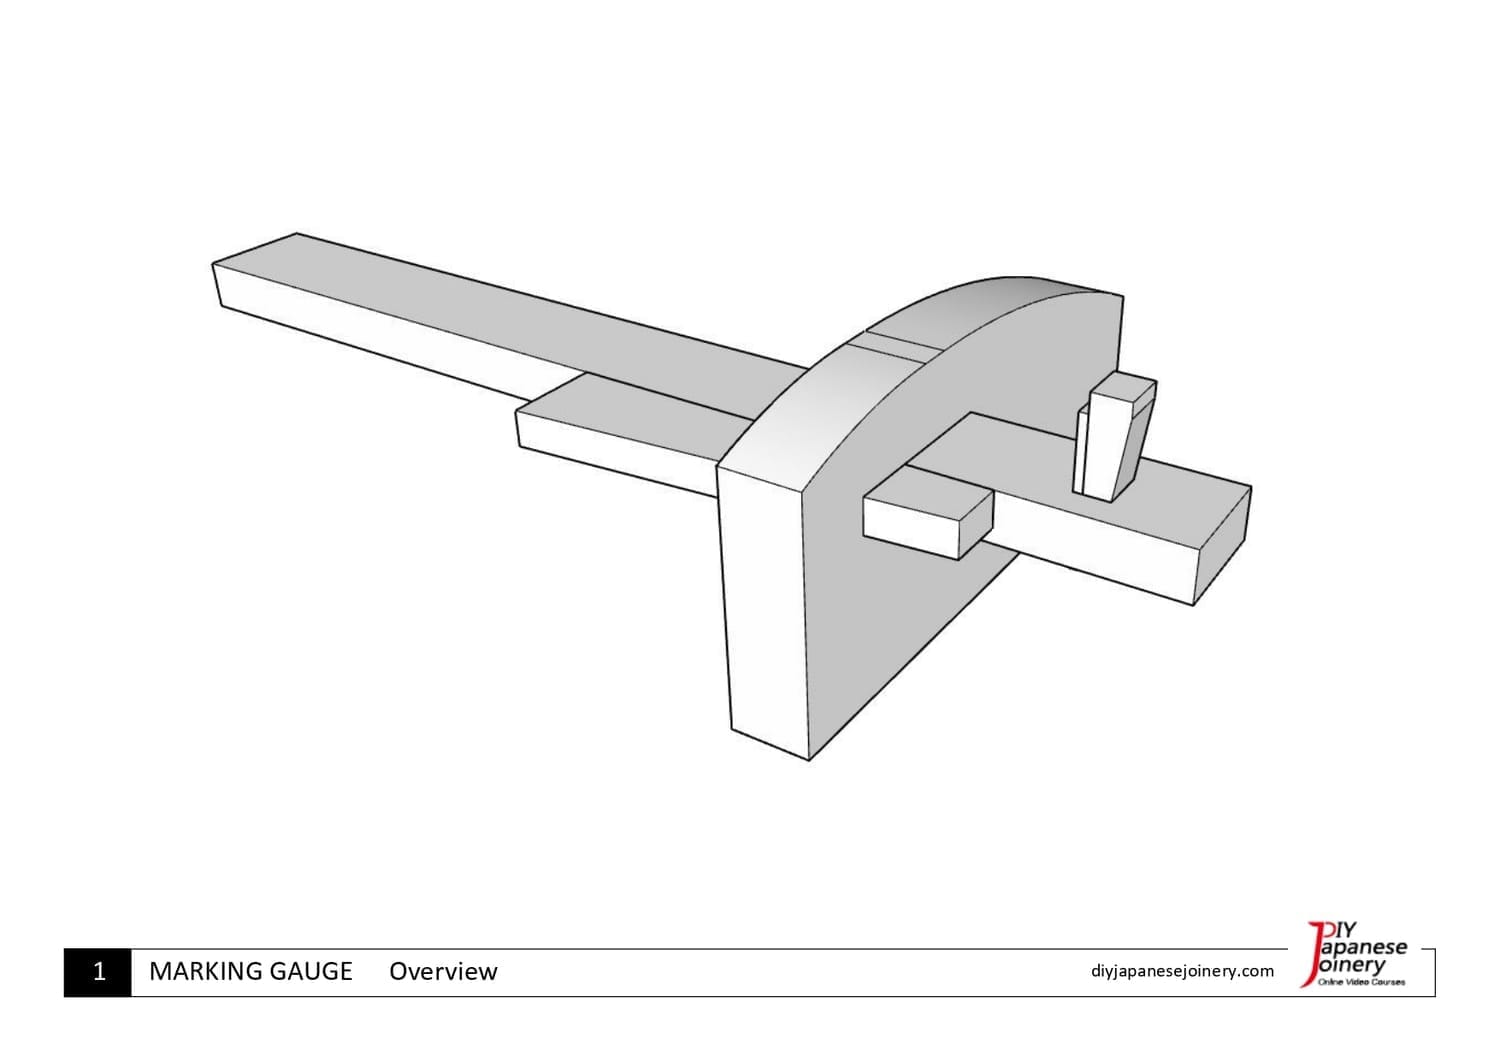
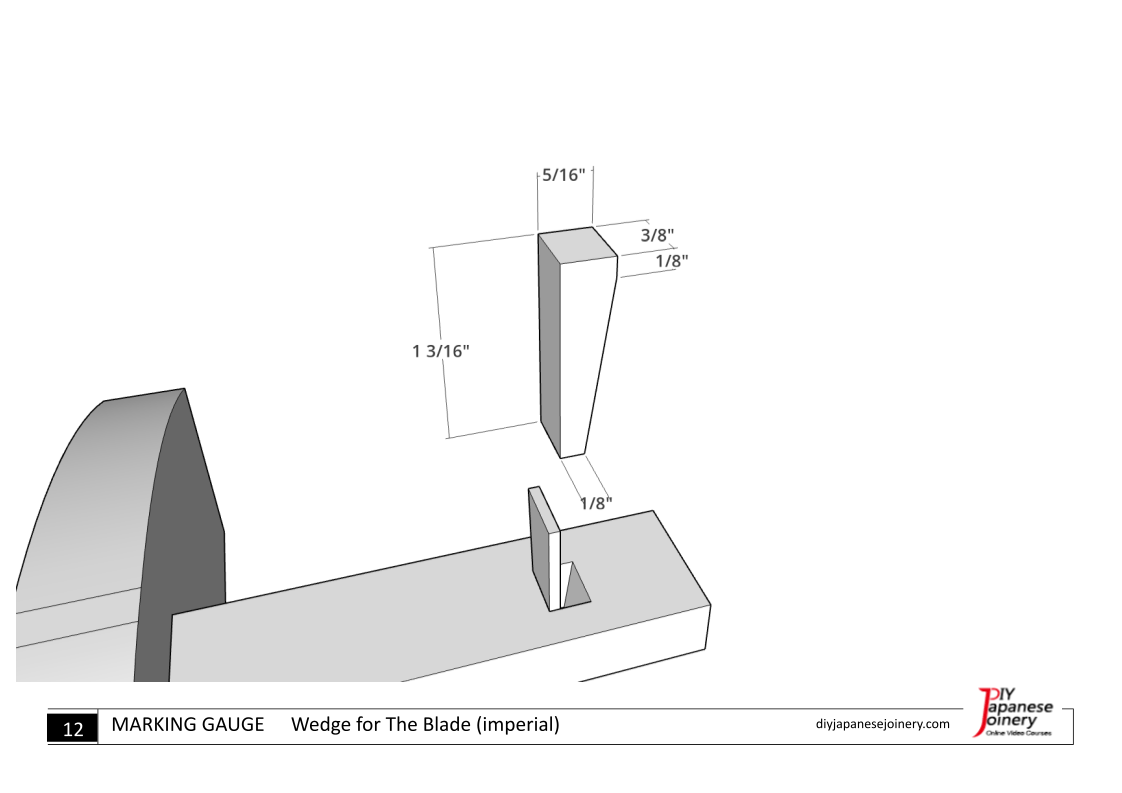
Get the detailed diagrams to craft your own Japanese marking gauge (Kehiki). Start your journey with the foundational tool of Japanese joinery.
Precision Starts with a Single Line.
Get the detailed diagrams to craft your own Japanese marking gauge (Kehiki). Start your journey with the foundational tool of Japanese joinery.
About me

Hi there, I’m Hisao Zen, a Japanese woodworking artisan with 25+ years’ experience. I share the techniques and traditions of joinery through online courses, guiding beginners step by step while inspiring them to carry this timeless craft into the future.
Latest Posts


©2017–2026 DIY Japanese Joinery
All pricing is in U.S. dollars.
Some images by Freepik