How to Sharpen the Bevel Side of a Japanese Chisel
Last Updated: 25 Aug 2025
Introduction
In the last article, we focused on polishing the backside of a chisel. Now it’s time to turn our attention to the bevel side—the angled face that forms the actual cutting edge. At first glance, it may look sharp, but looks can be deceiving. A blade straight from the grinder only has the rough shape of a chisel. Without proper sharpening, it’s nothing more than steel shaped like a tool, and not yet capable of precision work.
Why the Bevel Needs Sharpening
Unlike the backside, which only needs to be flattened from time to time, the bevel side of a chisel demands regular maintenance. This is because the bevel is the surface where the cutting edge is directly formed. Each time you use the chisel, the bevel edge gradually wears down. If it isn’t maintained, the tool will lose its bite, making cuts rougher, less accurate, and far more tiring to perform.
A dull bevel doesn’t just slow you down—it can also damage your work. Instead of slicing cleanly through fibres, a blunt edge will crush them, leaving ragged surfaces and increasing the chance of tear-out. Worse still, forcing a dull chisel through wood can put unnecessary strain on both the tool and your hands. This is why proper bevel sharpening is considered one of the most important habits in woodworking.
The sharpening process can be broken down into two essential steps:
Sharpening the blunt edge with a medium-grit whetstone.
This step establishes the basic geometry of the blade. As you grind away the dull edge, you’re creating a new cutting line. Done correctly, you’ll raise a small burr along the opposite side of the edge—proof that the bevel has been fully worked to its cutting point.Removing the burrs with a finishing stone.
Burrs are a natural by-product of sharpening, but they must be polished away to reveal a clean, razor-sharp edge. The finishing stone refines the bevel, smooths away roughness, and leaves you with a surface capable of precise and effortless cutting.
If the chisel is badly chipped or the edge has visible damage, an additional first step is required: working on a coarse stone. This removes the defects and reshapes the blade before you move on to the medium- and fine-grit stones. Skipping this step can waste time and leave the bevel uneven.
The theory of bevel sharpening is deceptively simple: keep the bevel flat and consistent. The flatter and straighter it is, the sharper your chisel will be. Not only does this produce a cleaner cut, but it also makes the edge last much longer between sharpening sessions. For this reason, craftsmen often say that a well-maintained bevel is the true heart of a sharp chisel.
Preparing the Whetstone
Before you start sharpening, your stones themselves need preparation. A sharpening stone that hasn’t been properly conditioned won’t perform as it should, no matter how skilled you are. The first step is to soak your medium-grit whetstone in a bucket of water for several minutes. This allows the stone to fully absorb moisture. When the pores of the stone are filled with water, it helps the abrasive particles float more freely, preventing the blade from clogging the surface. A well-soaked stone also cuts more efficiently, reduces friction, and produces a much smoother finish on the chisel bevel.
If you skip this soaking step, the stone will feel dry and “scratchy,” removing metal unevenly and often leaving deeper marks on the blade. Worse still, the surface can glaze over, making the stone cut less effectively with each pass. Think of soaking as priming the tool—you’re setting it up to perform at its best.
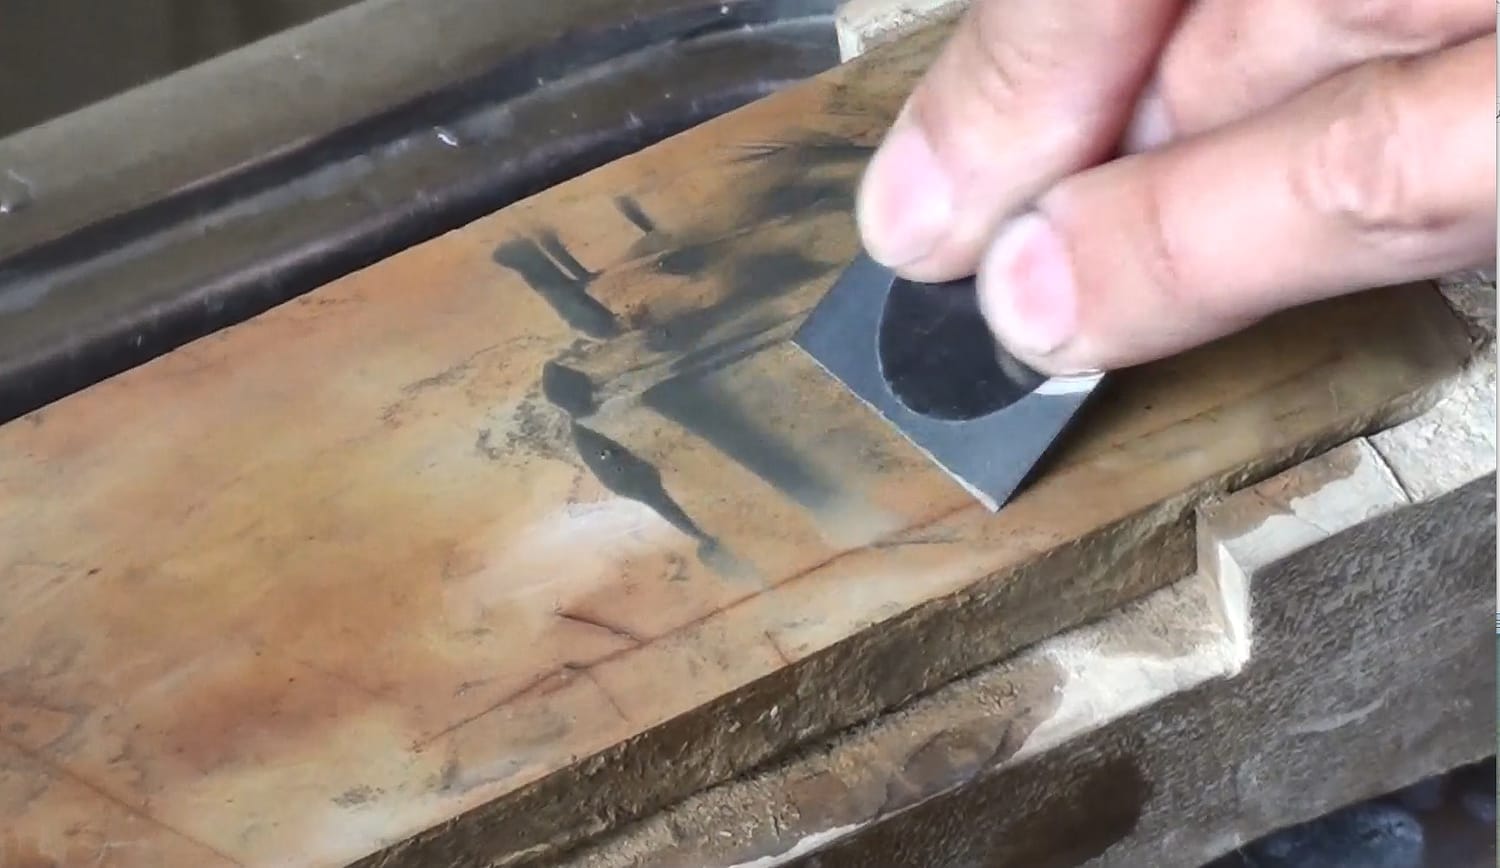
The next critical step is flattening the surface of the stone. Even brand-new whetstones are rarely perfectly flat, and after a few sharpening sessions they quickly develop a hollow in the centre, since that’s where most pressure is applied. If the stone isn’t flat, you’ll never be able to maintain a straight bevel—the chisel will either round off at the edge or end up uneven across its width.
To restore flatness, use a #400 diamond stone. Place it on top of the whetstone and rub gently with water until the high spots are levelled and the surface feels even. This not only ensures accuracy but also makes sharpening faster, since the chisel bevel can now make full contact with the stone.
Some traditional craftsmen use a concrete block with sand and water for flattening. This method works, but it requires extra space, creates a muddy mess, and can be inconvenient for those sharpening indoors. By contrast, a diamond stone is compact, efficient, and far less messy. For most woodworkers, it is the more practical choice, combining convenience with reliability.
Sharpening the Blunt Edge
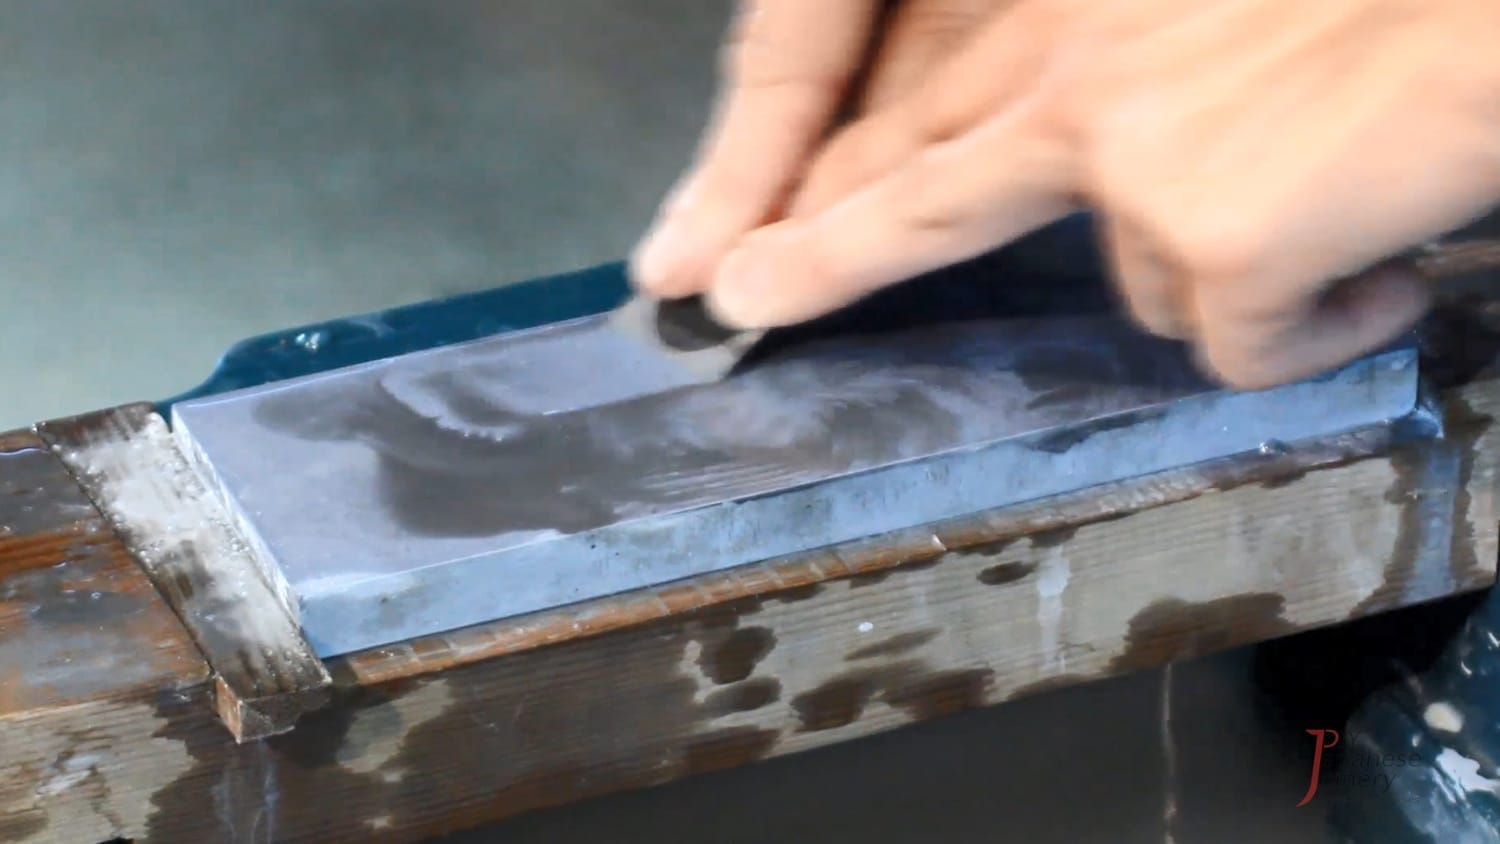
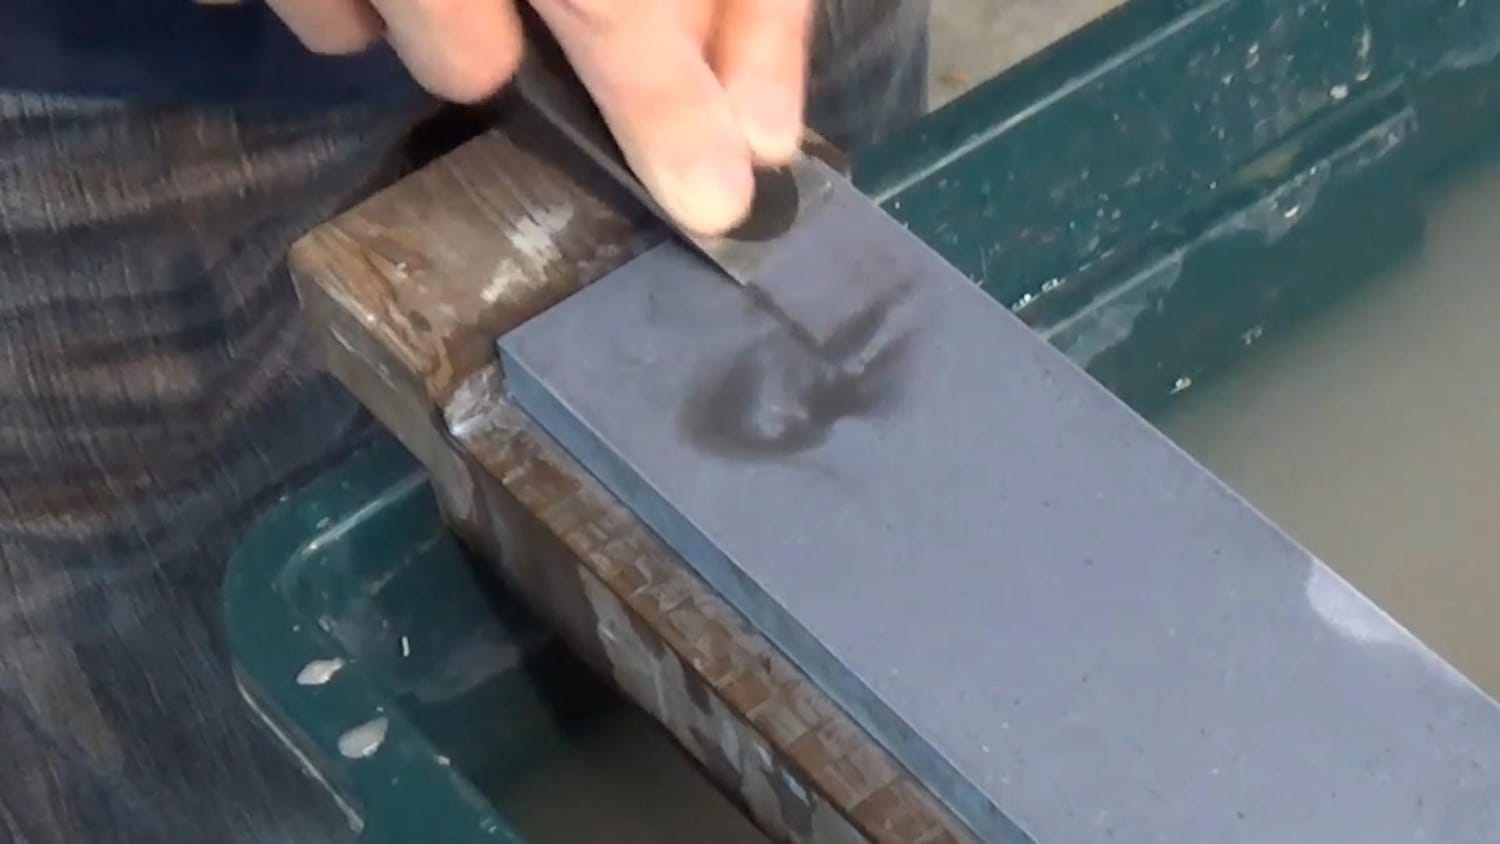
Now, place the chisel bevel flat against the stone and hold it securely. The way you grip the tool has a huge impact on your sharpening results. Hold the handle firmly with your dominant hand, letting your wrist and arm guide the motion. Rest your index finger on the corner of the blade—this acts as a stabiliser, keeping the bevel at the correct angle throughout the stroke. Meanwhile, place the fingers of your other hand lightly on the blade’s surface. These fingers aren’t for force; they provide balance and help you feel the subtle movements of the blade as it travels across the stone.
Begin moving the chisel back and forth in short, controlled strokes—about 30 mm at a time. Short strokes are highly recommended for two reasons. First, they make it easier to maintain a consistent angle, which is the foundation of proper sharpening. Long strokes may feel faster, but they often cause the angle to drift, leading to a rounded or uneven cutting edge.
Second, shorter movements spread the wear more evenly across the surface of the stone. This prevents grooves and hollows from forming, meaning your whetstone stays flatter for longer and requires less frequent resurfacing.
While you work, stay mindful of the bevel’s contact with the stone. The entire surface of the bevel should touch evenly; if only part of it is in contact, the sharpening will be uneven. Pay close attention to your pressure—too much force can gouge the stone or tilt the bevel, while too little may not raise burrs effectively. Think of the motion as guiding rather than grinding.
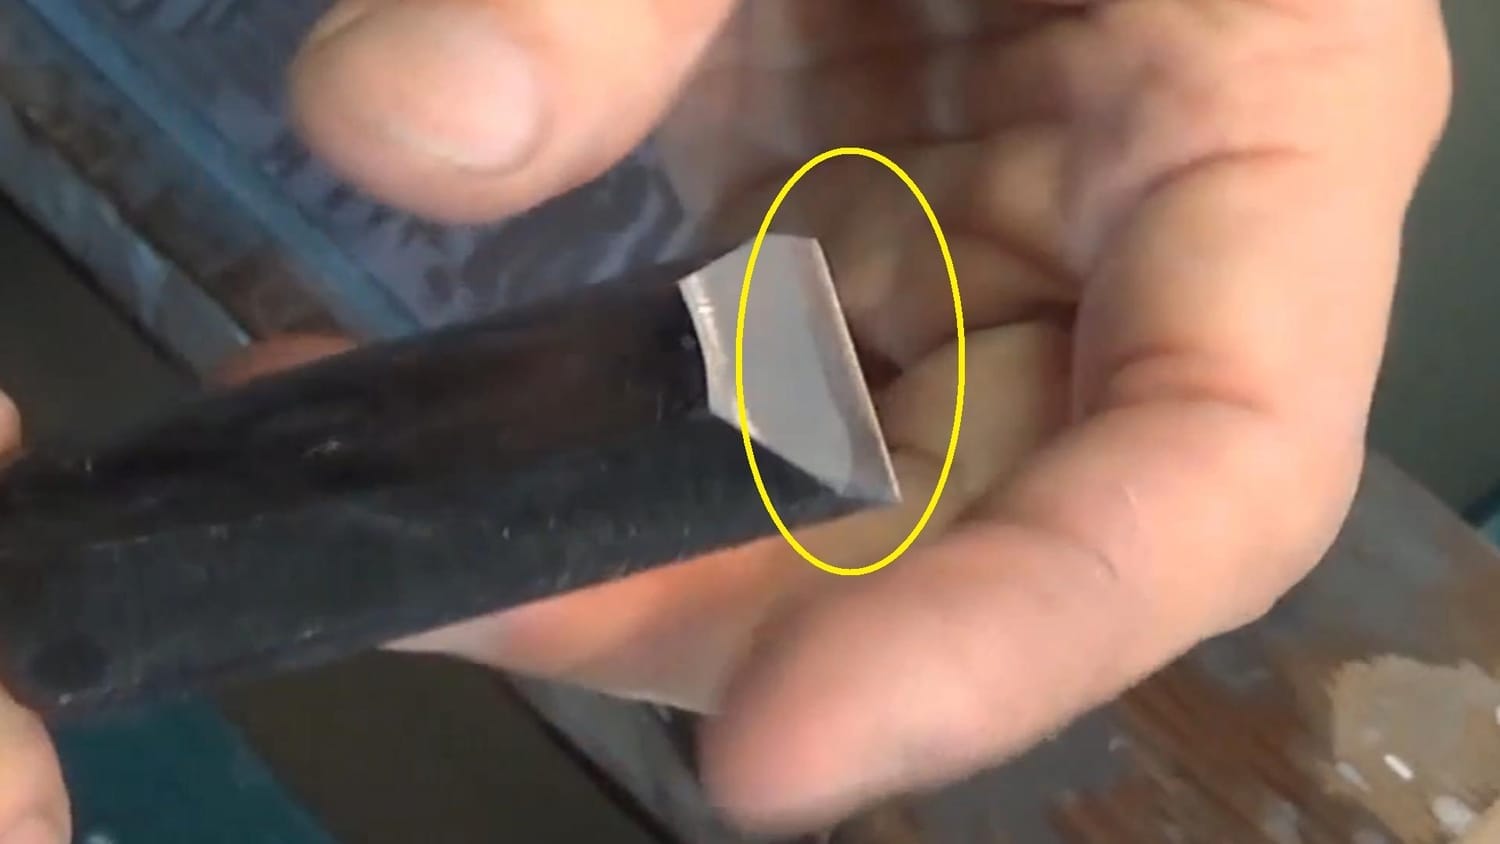
As the sharpening progresses, check frequently for burrs forming along the cutting edge. Burrs are tiny ridges of displaced metal that signal you’ve sharpened the bevel right to the edge. To detect them, run your thumb or fingertip lightly across (never along) the edge. At first, beginners often struggle to feel them, but with time your sense of touch will develop until even the faintest burr becomes obvious. Some craftsmen always use the same finger for this test, so that sensitivity builds consistently.
Remember, the presence of burrs means you’ve reached the edge—but it doesn’t automatically mean the bevel is perfectly shaped. If your angle was inconsistent, you may still have a weak or rounded edge. That’s why patience, controlled strokes, and steady technique are just as important as simply producing burrs.

Hold the handle firmly and rest your index finger on one corner of the blade.
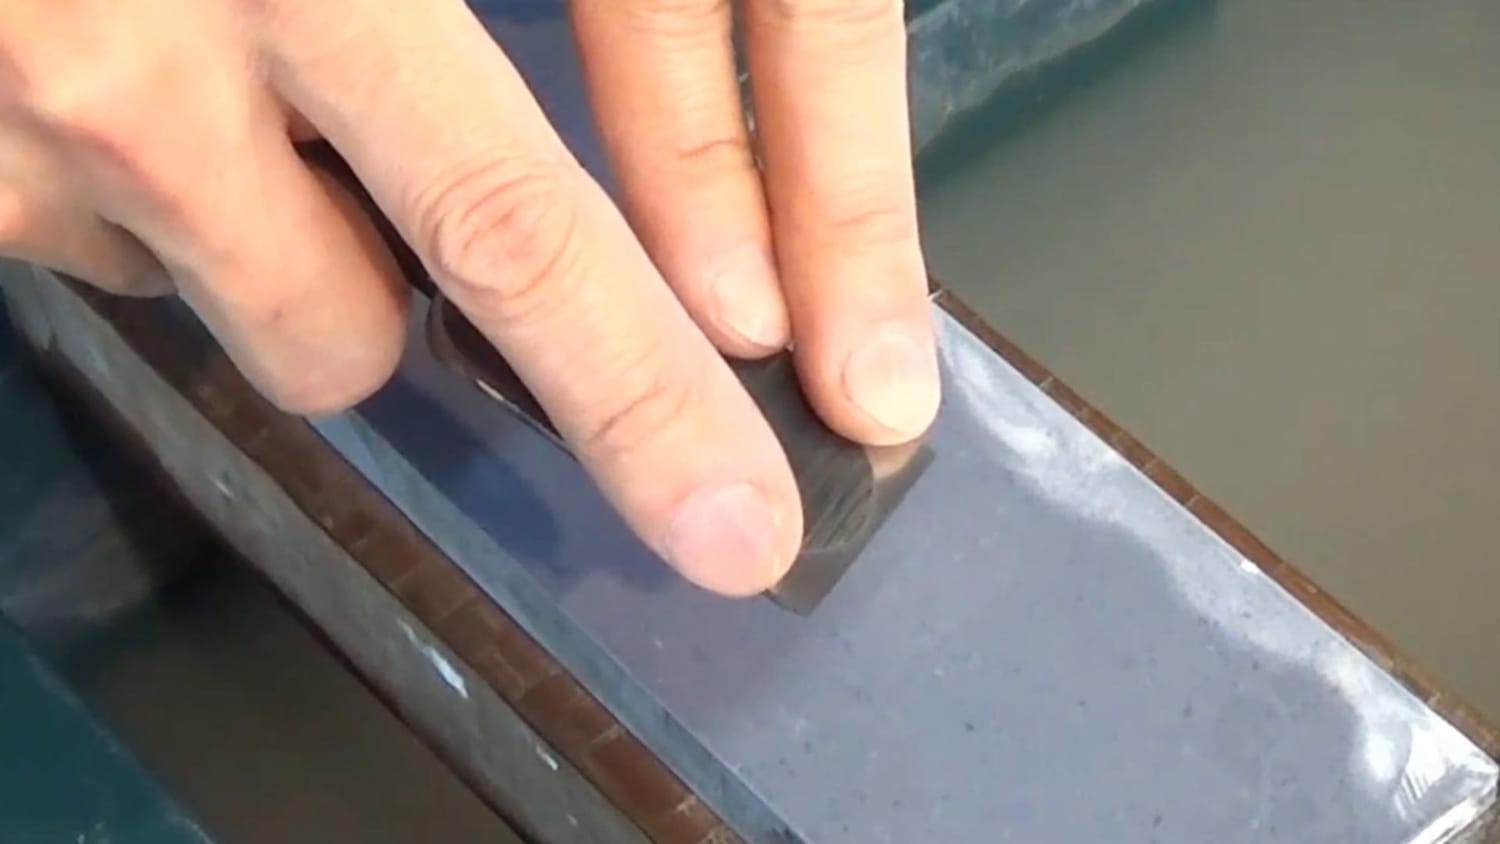
Support the chisel by placing the index and middle fingers of your other hand on the opposite corner.
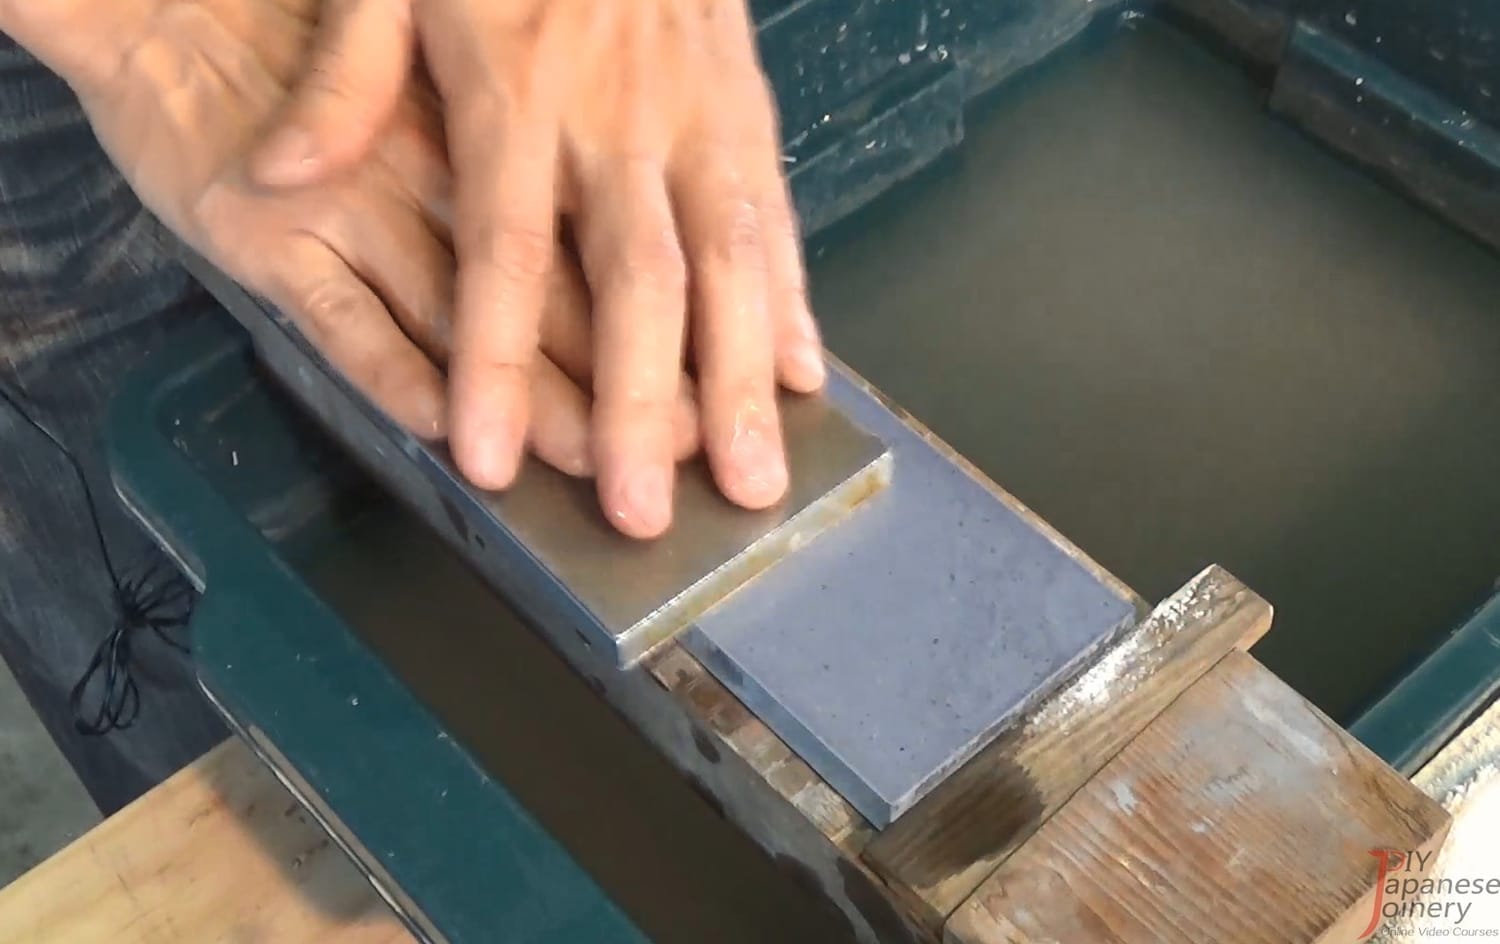
Begin sharpening with short strokes, about 30 mm, from the near end of the stone.
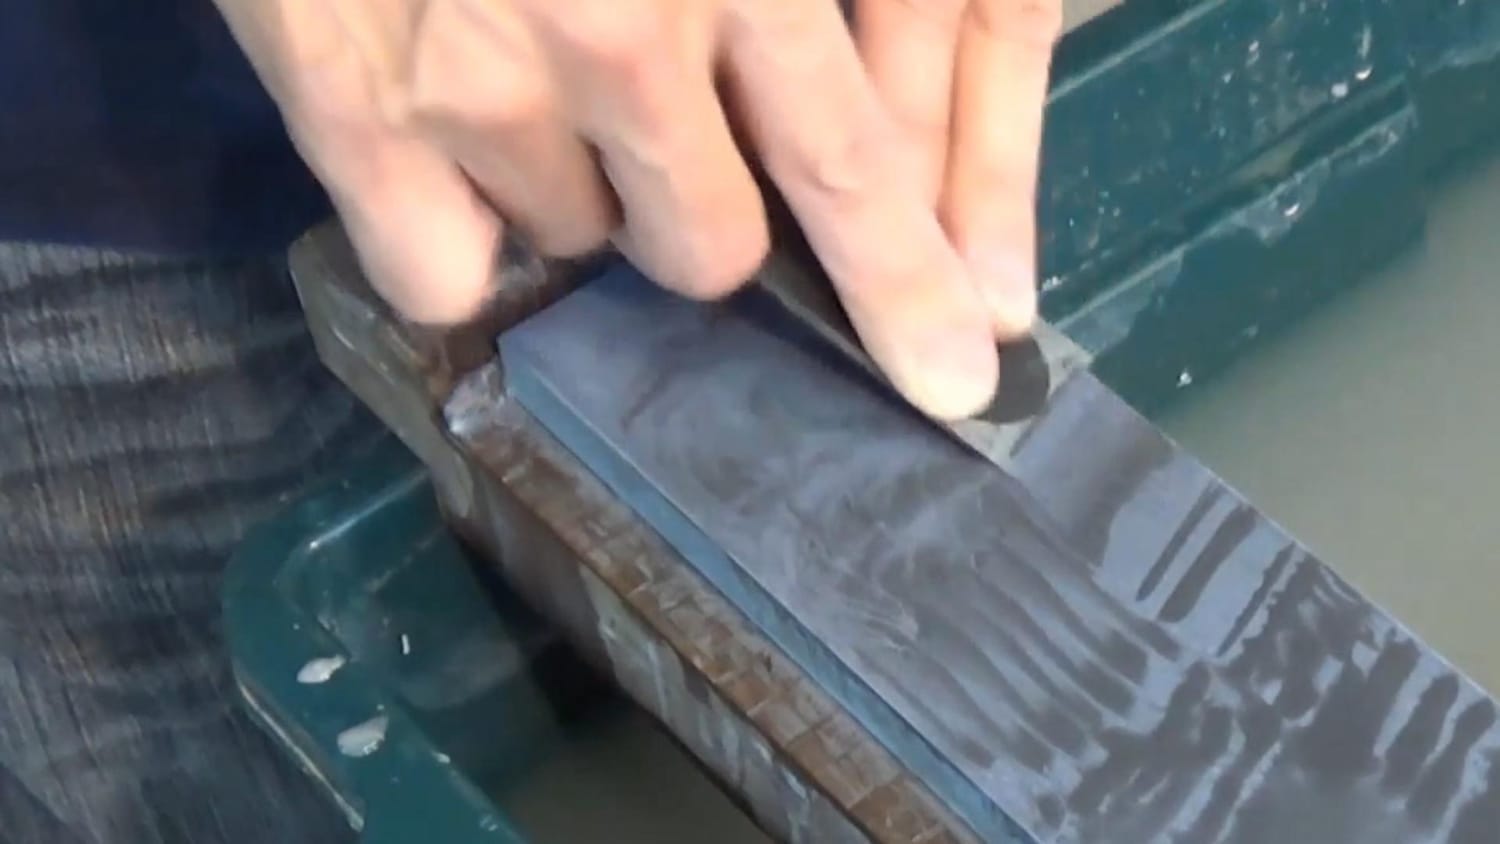
Use the full surface of the stone to keep both the blade and stone even.
Common Mistakes to Avoid
Many beginners assume that the mere appearance of burrs means the bevel is properly sharpened. In reality, a burr can form even when the angle drifts. If the bevel rocks—however slightly—the edge may be blunt or rounded, and the burr you feel is just a fragile wire edge that will fold or tear off in use.
Another common issue is limited contact: only a small strip of the bevel actually touches the whetstone. When this happens, the bevel isn’t being worked evenly, and the edge won’t be shaped correctly. You might see a narrow shiny band right at the cutting edge, scratches running diagonally instead of straight, or an uneven polished zone across the width of the blade. These are all signs that the bevel is not flat against the stone.
To avoid this, lock in a flat, steady angle and let your whole body—not just your wrists—drive the stroke. Use short, controlled movements, keep pressure light and even, and resist the urge to rush. Re-centre your fingers whenever you feel the bevel start to rock, and refresh the stone’s surface if it begins to clog. Sharpening is as much about repeatable technique as it is about the tools themselves.
In short: burrs are necessary, but they only have meaning if the bevel is shaped evenly at a consistent angle. Get those elements right, and you will create a solid foundation for the next step in sharpening.
Next in the Series
In the next post, How to Polish and Sharpen Japanese Chisels (Nomi) for a Perfect Cutting Edge, we’ll focus on refining the cutting edge itself. Using the finishing stone, we’ll polish the bevel to its final sharpness, learning how to achieve that effortless, razor-like edge that defines a professional-quality chisel.
Ready for structured, in-depth training?
Latest Posts
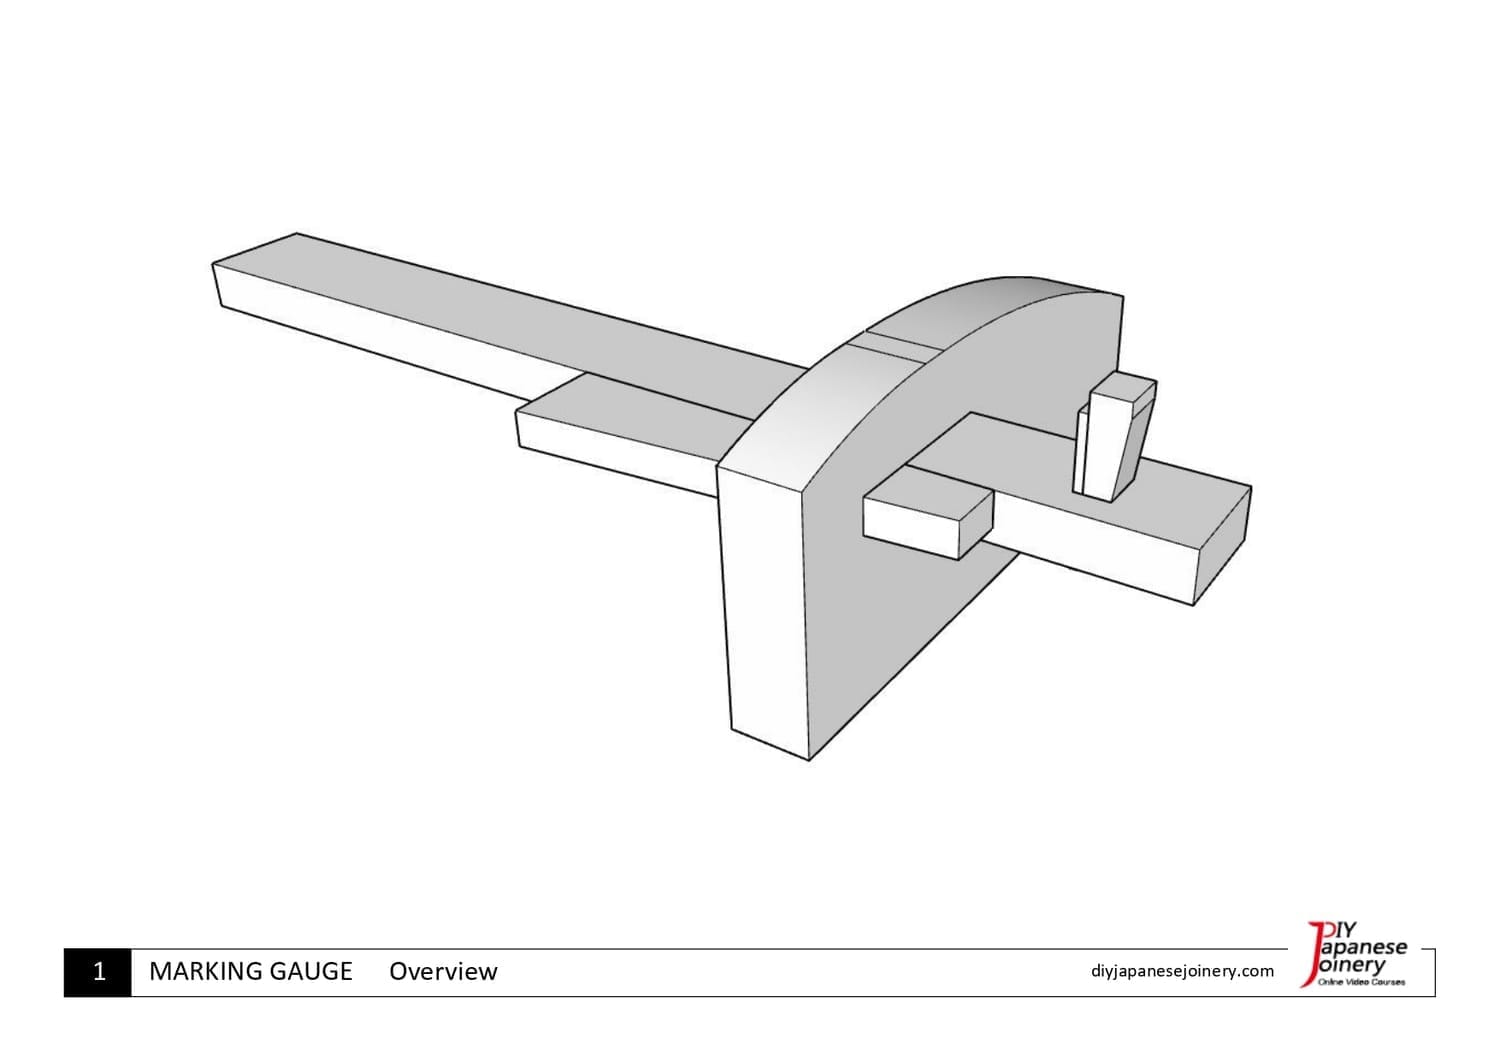
Precision Starts with a Single Line.
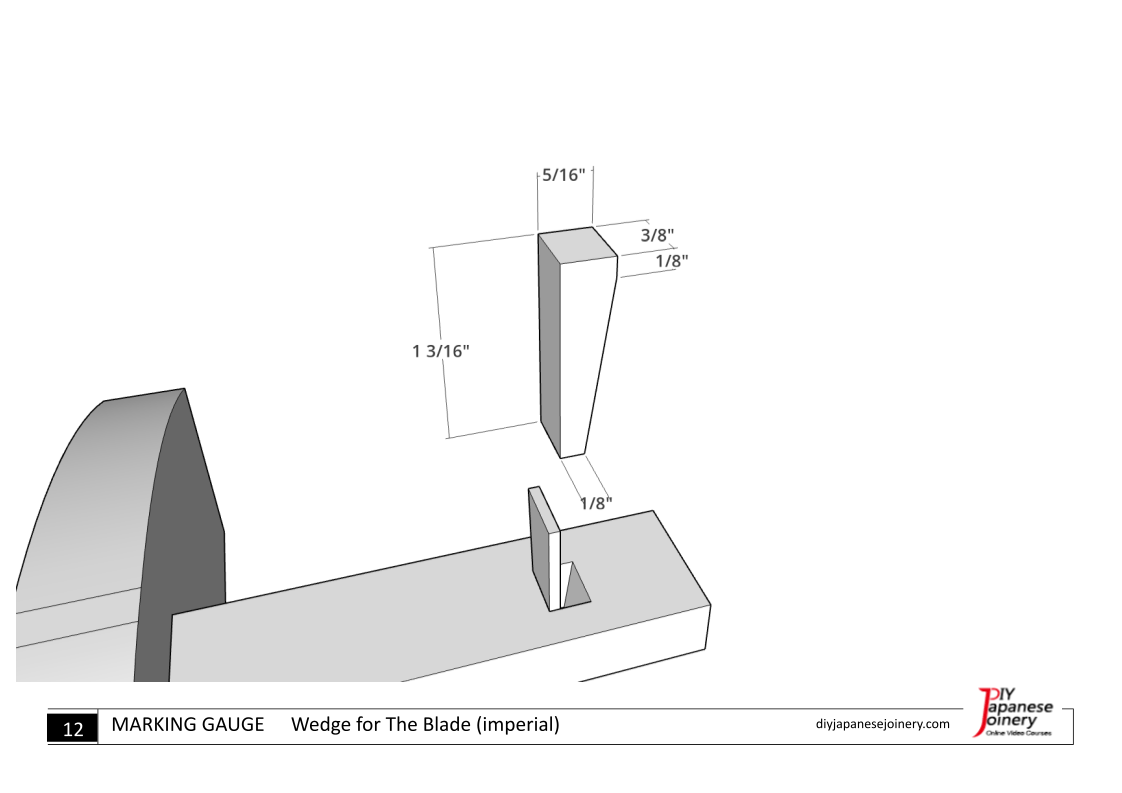
Get the detailed diagrams to craft your own Japanese marking gauge (Kehiki). Start your journey with the foundational tool of Japanese joinery.
Precision Starts with a Single Line.
Get the detailed diagrams to craft your own Japanese marking gauge (Kehiki). Start your journey with the foundational tool of Japanese joinery.
About me

Hi there, I’m Hisao Zen, a Japanese woodworking artisan with 25+ years’ experience. I share the techniques and traditions of joinery through online courses, guiding beginners step by step while inspiring them to carry this timeless craft into the future.
Latest Posts


©2017–2026 DIY Japanese Joinery
All pricing is in U.S. dollars.
Some images by Freepik